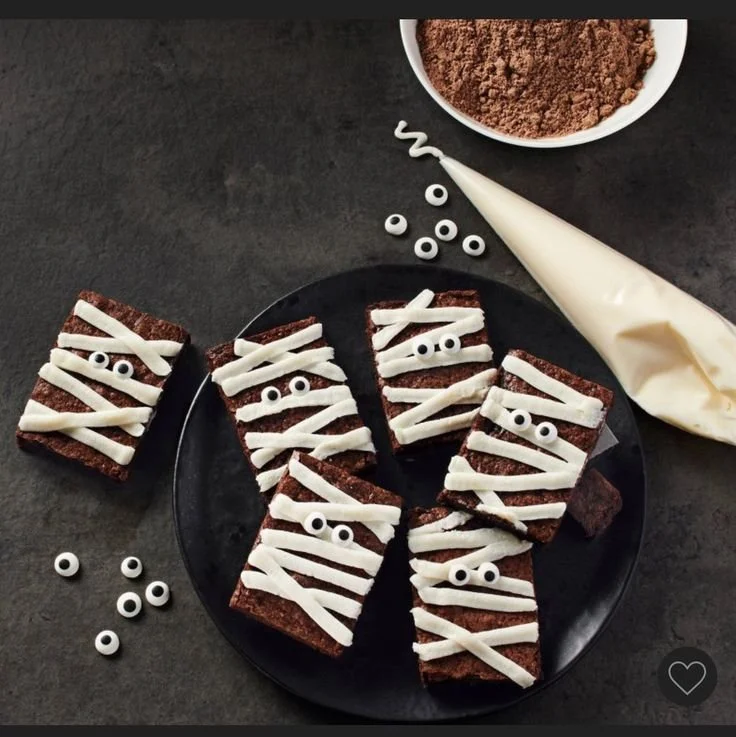
Halloween Mummy Brownies are a delightful treat that perfectly combines festive fun with rich chocolatey goodness. These simple yet creative desserts are not only cute but also indulgent, making them a must-try for any Halloween celebration. They bring smiles to both kids and adults alike, offering a unique and delicious way to embrace the spirit of Halloween.
Why You’ll Love Halloween Mummy Brownies
- Fun and Festive: These brownies are a playful take on Halloween treats, making them an exciting addition to any gathering or party.
- Easy to Make: With straightforward instructions, even beginner bakers can whip up these adorable desserts without stress.
- Rich Chocolate Flavor: The decadent brownie base is rich and fudgy, satisfying even the most intense chocolate cravings.
- Customizable Designs: You can personalize your mummies with different candies, allowing for creative expression in the kitchen.
- Perfect for Sharing: These brownies are great for parties, school events, or as a fun surprise in lunch boxes. They are sure to be a hit!
Recipe Overview
- Prep Time: 20 minutes
- Cook Time: 30 minutes
- Total Time: 50 minutes
- Servings: 12
- Difficulty Level: Easy
Ingredients You’ll Need for Halloween Mummy Brownies
-
For the Brownies:
- 1 cup unsalted butter (provides moisture and richness)
- 2 cups granulated sugar (adds sweetness and helps with texture)
- 4 large eggs (binds ingredients and adds structure)
- 1 teaspoon vanilla extract (enhances flavor)
- 1 cup all-purpose flour (main structure)
- 1 cup cocoa powder (for a rich chocolate flavor)
- 1 teaspoon baking powder (helps brownies rise)
- 1/2 teaspoon salt (balances sweetness and enhances flavor)
-
For the Decoration:
- White chocolate melts or candy coating (for mummy bandages)
- Chocolate chips or mini chocolate candies for eyes (adds character and fun)
How to Make Halloween Mummy Brownies
-
Preheat the Oven
Preheat your oven to 350°F (175°C). Prepare a 9×13-inch baking pan by greasing it or lining it with parchment paper for easier removal. -
Melt Butter
In a medium saucepan, melt the butter over low heat. Once melted, remove from heat and let it cool slightly before mixing in the sugar. -
Combine Wet Ingredients
In a large mixing bowl, whisk together the melted butter and granulated sugar until combined. Add the eggs one at a time, mixing well after each addition, followed by the vanilla extract. -
Mix Dry Ingredients
In another bowl, sift together the all-purpose flour, cocoa powder, baking powder, and salt. This helps to aerate the flour and remove any lumps. -
Combine Wet and Dry Mixtures
Gradually fold the dry mixture into the wet ingredients, stirring until just combined. Be careful not to overmix, as this can make the brownies tough. -
Bake the Brownies
Pour the brownie batter into the prepared pan, spreading it evenly. Bake for 25-30 minutes or until a toothpick inserted into the center comes out with a few moist crumbs. Allow the brownies to cool completely in the pan. -
Decorate as Mummies
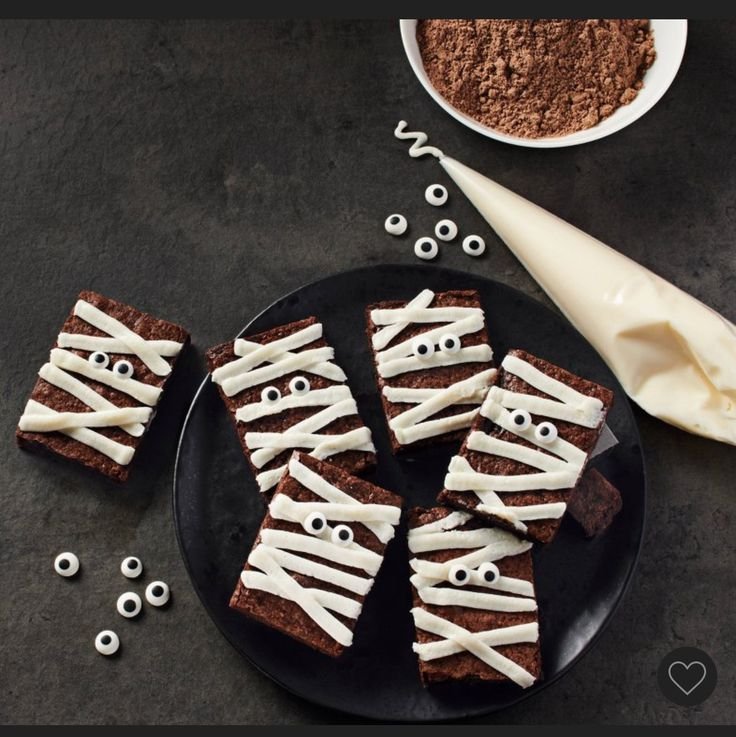
Once the brownies are cooled, cut them into bars or squares. Melt the white chocolate according to package instructions. Using a piping bag or a zip-top bag with the corner snipped, drizzle the white chocolate over each brownie to create mummy bandages. Place chocolate chips or mini chocolate candies for eyes.
Tips for Success
- Don’t Overbake: Check your brownies a few minutes before the recommended time to ensure they stay soft and fudgy.
- Cooling Time: Allow the brownies to cool completely before cutting to maintain its structure.
- Piping Chocolate: For easier drizzling, ensure the melted white chocolate isn’t too hot; if it thickens, you can reheat it slightly.
- Chill Before Decorating: If your brownies are too soft to decorate, chill them in the refrigerator for about 30 minutes to firm them up.
- Experiment: Feel free to adjust the toppings with your favorite candies or sprinkles for an extra festive touch.
Easy Variations
- Chocolate Frosting: Instead of white chocolate for mummy bandages, use chocolate frosting to create a different flavor profile.
- Add Some Crunch: Mix in chopped nuts or crushed cookies into the brownie batter for added texture.
- Colorful Candies: Use colorful candies such as M&Ms or Skittles for the eyes for a more vibrant look.
- Peanut Butter Drizzle: Add a drizzle of melted peanut butter over the white chocolate for a delicious twist.
What to Serve with Halloween Mummy Brownies
- Spooky Punch: A bubbling fruit punch enhances the festive atmosphere and pairs well with sweet desserts.
- Ghostly Cupcakes: Cupcakes decorated with ghostly frosting complement the cute factor of the mummy brownies.
- Candy Corn: This classic Halloween treat offers a colorful, sweet contrast to the rich brownies.
- Caramel Apples: A crunchy treat that balances the softness of the brownies and adds a fresh flavor.
- Ice Cream: A scoop of vanilla or pumpkin spice ice cream is a perfect creamy partner for the fudgy brownies.
Storage and Reheating
- Refrigerator Storage: Store leftover brownies in an airtight container in the refrigerator for up to a week. This helps maintain their freshness.
- Freezer Storage: You can freeze brownies for up to three months. Wrap each piece tightly in plastic wrap and place them in a freezer-proof container.
- Reheating: To reheat, pop a brownie in the microwave for 10-15 seconds until warm. For frozen brownies, allow them to thaw in the refrigerator overnight before reheating.
- Texture Preservation: When storing in the fridge, be sure to wrap brownies to avoid drying them out.
Common Mistakes to Avoid
- Incorrect Oven Temperature: Using the wrong oven temperature can affect the brownies’ baking time and texture.
- Skipping the Cooling Step: Cutting brownies while they’re still warm can lead to a messy result. Allow them to cool completely.
- Overmixing Batter: Stirring too much can make your brownies dense instead of chewy. Mix until just combined.
- Not Greasing the Pan: Ensure your pan is sufficiently greased or lined to avoid sticking.
Halloween Mummy Brownies: Background & Cultural Inspiration
Halloween has a rich history that celebrates the transition from summer to winter and honors the spirits of those who have passed away. The tradition of trick-or-treating, along with festive baking, has evolved over centuries. Mummy Brownies draw on the theme of mummies and wrapping, reflecting both Halloween’s spooky elements and the playful creativity of holiday baking. These brownies offer a delightful merge of fun and flavor, making them a modern favorite in seasonal festivities.
Frequently Asked Questions
Can I use a different chocolate for the mummy bandages?
Yes! Milk chocolate or dark chocolate can also be used for a unique flavor twist.
How should I store the brownies?
Store them in an airtight container in the refrigerator for up to a week or freeze them for longer storage.
Can I make these brownies ahead of time?
Absolutely! You can bake the brownies a day in advance and decorate them just before serving for the freshest look.
What can I use as a substitute for eggs?
For an egg substitute, you can use unsweetened applesauce, mashed bananas, or a commercial egg replacer. Each will slightly alter the texture.
How do I fix brownies that turned out dry?
If your brownies are too dry, you can serve them with a scoop of ice cream or a drizzle of chocolate sauce to add moisture back.
Final Thoughts
Halloween Mummy Brownies are not just a treat; they are a fun way to embrace the season. Their cheerful appearance and indulgently rich flavor make them perfect for sharing with family and friends. Whether you’re throwing a Halloween party or simply looking for a festive dessert to brighten your day, these brownies are sure to delight. Try making them this Halloween season, and enjoy the smiles they bring!
PrintHalloween Mummy Brownies
Delightful Halloween brownies that combine festive fun with rich chocolatey goodness, perfect for celebrations.
- Prep Time: 20 minutes
- Cook Time: 30 minutes
- Total Time: 50 minutes
- Yield: 12 servings
- Category: Dessert
- Method: Baking
- Cuisine: American
- Diet: Vegetarian
Ingredients
- 1 cup unsalted butter
- 2 cups granulated sugar
- 4 large eggs
- 1 teaspoon vanilla extract
- 1 cup all-purpose flour
- 1 cup cocoa powder
- 1 teaspoon baking powder
- 1/2 teaspoon salt
- White chocolate melts or candy coating
- Chocolate chips or mini chocolate candies for eyes
Instructions
- Preheat the oven to 350°F (175°C) and prepare a 9×13-inch baking pan.
- Melt the butter in a medium saucepan over low heat, then cool slightly.
- Combine the melted butter and granulated sugar in a large mixing bowl; add eggs one at a time, then vanilla extract.
- Mix the flour, cocoa powder, baking powder, and salt in another bowl.
- Combine the dry mixture with the wet ingredients until just combined.
- Pour the batter into the prepared pan and bake for 25-30 minutes.
- Cool the brownies completely, then cut into bars or squares.
- Decorate with melted white chocolate to create mummy bandages and add chocolate candies for eyes.
Notes
Cool brownies completely before cutting for better structure. Experiment with toppings for a fun twist.












