Halloween is the perfect time to get creative in the kitchen, and this Trick or Treat: Simple Homemade Halloween Bark Using Leftover Halloween Candy is a delightful way to use up your sweet haul. Not only is it easy to make, but it also combines the rich flavor of chocolate with colorful and fun candy pieces. This recipe will surely impress friends and family, making it a go-to treat for the spooky season.
Why You’ll Love Trick or Treat: Simple Homemade Halloween Bark
- Easy to Make: This recipe requires minimal steps and simple ingredients, making it perfect for beginner cooks.
- Customizable: Use any leftover Halloween candy you like, letting your creativity run wild with flavors and textures.
- Quick to Prepare: You’ll have a tasty treat ready in just a couple of hours, from melting to serving.
- Fun Activity: Get the whole family involved in creating their own custom bark with chosen candies and toppings.
- Perfect for Gifting: Package the finished bark in cute bags or boxes to share with friends and neighbors during the Halloween season.
Recipe Overview
- Prep Time: 15 minutes
- Cook Time: 10 minutes
- Total Time: 2 hours 25 minutes (includes cooling time)
- Servings: Approximately 12 pieces, depending on size
- Difficulty Level: Easy
Ingredients You’ll Need for Trick or Treat: Simple Homemade Halloween Bark
- Chocolate:
- 12 ounces of rich chocolate (dark or milk)
- Leftover Halloween Candy:
- Any combination of your favorite Halloween candies such as M&M’s, candy corn, Snickers, or Kit Kats.
- Optional Toppings:
- Sprinkles, chopped nuts, or extra chocolate drizzles for added decoration.
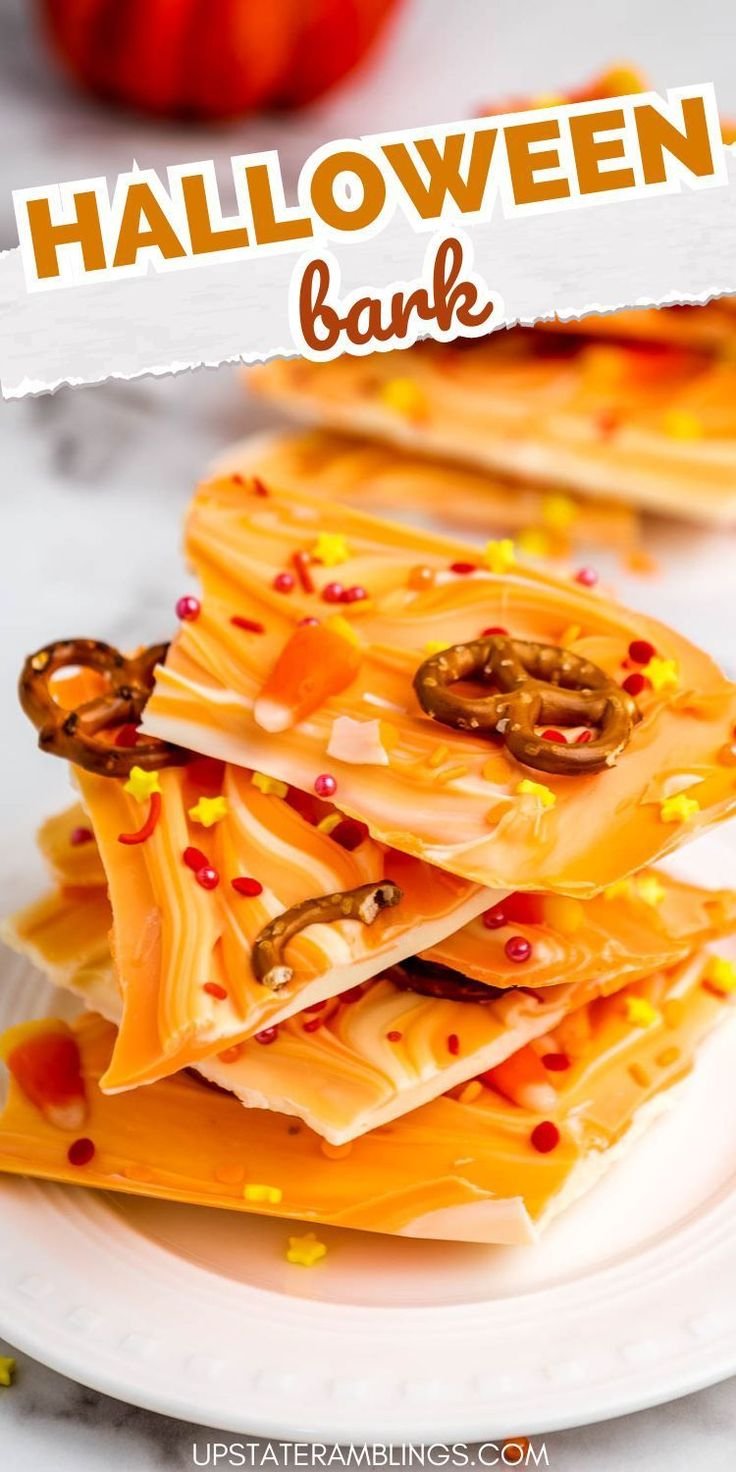
How to Make Trick or Treat: Simple Homemade Halloween Bark
-
Melt the Chocolate: In a microwave-safe bowl, heat the chocolate in 30-second intervals, stirring in between, until smooth. Alternatively, use a double boiler to melt the chocolate gently.
-
Spread the Chocolate: Pour the melted chocolate onto a lined baking sheet. Using a spatula, spread it evenly to form a flat layer about 1/4 inch thick.
-
Add the Candy: Chop your leftover Halloween candy into smaller pieces and sprinkle them evenly over the melted chocolate. Feel free to add any additional toppings you desire, like nuts or sprinkles.
-
Cool and Harden: Allow the bark to cool at room temperature or place it in the refrigerator until firmly set, usually about 2 hours.
-
Break and Enjoy: Once hardened, break the bark into pieces of your desired size. Enjoy your homemade Halloween bark or package it up for sharing!
Tips for Success
- Use Quality Chocolate: Opt for high-quality chocolate for a smoother melting process and richer flavor.
- Chop Candy Uniformly: This ensures even distribution over the chocolate, allowing each piece to have a variety of flavors and textures.
- Don’t Overheat: If melting in the microwave, avoid overheating the chocolate to prevent it from seizing.
- Experiment with Flavors: Try mixing in some crushed cookies or a sprinkle of sea salt for an added flavor contrast.
- Cool Time Matters: Allowing enough cooling time will help ensure that your bark sets properly and doesn’t break too easily when you’re ready to serve.
Easy Variations
- Nut-Free Option: Skip the nuts and use crispy rice cereal for crunch.
- Dried Fruit: Add chopped dried fruits like cranberries or apricots for a chewy texture and a burst of flavor.
- Spicy Twist: Incorporate a pinch of cayenne pepper or chili flakes into the chocolate for a subtle kick.
- White Chocolate: Use white chocolate instead of milk or dark chocolate for a different flavor profile.
- Holiday Themes: Customize your bark for other holidays using seasonal candies or colors to match.
What to Serve with Trick or Treat: Simple Homemade Halloween Bark
- Warm Beverage: Pair your Halloween bark with a warm cup of hot chocolate or apple cider to enhance the fall flavors.
- Ice Cream: Serve alongside vanilla or pumpkin spice ice cream for a delightful dessert experience.
- Cookies: Offer with homemade cookies such as chocolate chip or oatmeal raisin for a sweet treat platter.
- Cheese Board: Include on a festive cheese board for a mix of sweet and savory tastes, combining chocolate, nuts, and cheeses.
Storage and Reheating
- Refrigerator Storage: Store the bark in an airtight container in the refrigerator for up to 2 weeks.
- Freezer Storage: For longer storage, you can freeze the bark in an airtight container or freezer bag for up to 3 months.
- Reheating: There is typically no need to reheat (since it’s served cold), but if you want to make it more melt-in-your-mouth, allow it to sit at room temperature for a few minutes before enjoying.
- Preserving Texture: Ensure the bark is well-wrapped to avoid moisture in the refrigerator or freezer.
Common Mistakes to Avoid
- Burning the Chocolate: Be vigilant when melting chocolate; microwaves can vary in strength. Stir often and stop as soon as it’s melted.
- Not Using Parchment: Always line your baking sheet to prevent the bark from sticking.
- Too Much Candy: Overloading on candy can make it hard to break apart. Balance is key.
- Skipping Cooling Time: Don’t rush the cooling process; it needs time to set fully for the best texture.
- Using Old Candy: Ensure your leftover candy is fresh to maintain flavor and texture in your bark.
Trick or Treat: Simple Homemade Halloween Bark: Background & Cultural Inspiration
The concept of bark goes back to various cultures that have celebrated the harvesting of chocolate. Traditionally, chocolate bark features a base layer of chocolate adorned with various toppings. The use of Halloween candy to create this treat highlights the season’s spirit, repurposing sweets for a fun and festive dessert. This recipe encapsulates the joy of Halloween, allowing families to gather around and create something delicious while enjoying leftover treats. Sharing homemade sweets during Halloween fosters community and generosity, traditions that date back to the essence of this spooky holiday.
Frequently Asked Questions
Can I use other types of chocolate?
Absolutely! Feel free to substitute dark chocolate, white chocolate, or even a mix, depending on your flavor preference.
How long will the Halloween bark last?
When stored in an airtight container at room temperature, the bark can last up to two weeks. In the fridge, it’s good for up to a month.
Can I make it ahead of time?
Yes, the bark can be made several days in advance. Just store it properly to keep it fresh.
What if my chocolate seizes when melting?
If your chocolate seizes, you can try adding a small amount of vegetable oil or shortening to smooth it out. However, it’s best to be cautious while melting.
Can I add spices for flavor?
Yes, a pinch of cinnamon or instant coffee granules can enhance the chocolate flavor beautifully without overwhelming it.
Final Thoughts
This Trick or Treat: Simple Homemade Halloween Bark Using Leftover Halloween Candy is a fast, fun, and delicious way to enjoy your post-Halloween treats. With its customizable nature, it’s a recipe that encourages creativity and enjoyment in the kitchen. Try making this festive treat to share with family and friends, and embrace the spirit of the season!
PrintTrick or Treat: Simple Homemade Halloween Bark Using Leftover Halloween Candy

A delightful way to use up leftover Halloween candy by making easy, customizable chocolate bark.
- Prep Time: 15 minutes
- Cook Time: 10 minutes
- Total Time: 145 minutes
- Yield: 12 pieces
- Category: Dessert
- Method: No-Cook
- Cuisine: American
- Diet: Vegetarian
Ingredients
- 12 ounces of rich chocolate (dark or milk)
- Any combination of leftover Halloween candies (e.g., M&M’s, candy corn, Snickers, Kit Kats)
- Optional toppings: sprinkles, chopped nuts, or extra chocolate drizzles
Instructions
- Melt the chocolate in a microwave-safe bowl in 30-second intervals, stirring until smooth, or use a double boiler.
- Spread the melted chocolate onto a lined baking sheet, forming a flat layer about 1/4 inch thick.
- Add chopped leftover Halloween candy over the melted chocolate, along with any desired additional toppings.
- Cool the bark at room temperature or in the refrigerator until it is firmly set, usually about 2 hours.
- Break the hardened bark into pieces and enjoy or package for sharing.
Notes
Use quality chocolate for best results, and ensure even candy distribution for a variety of flavors.