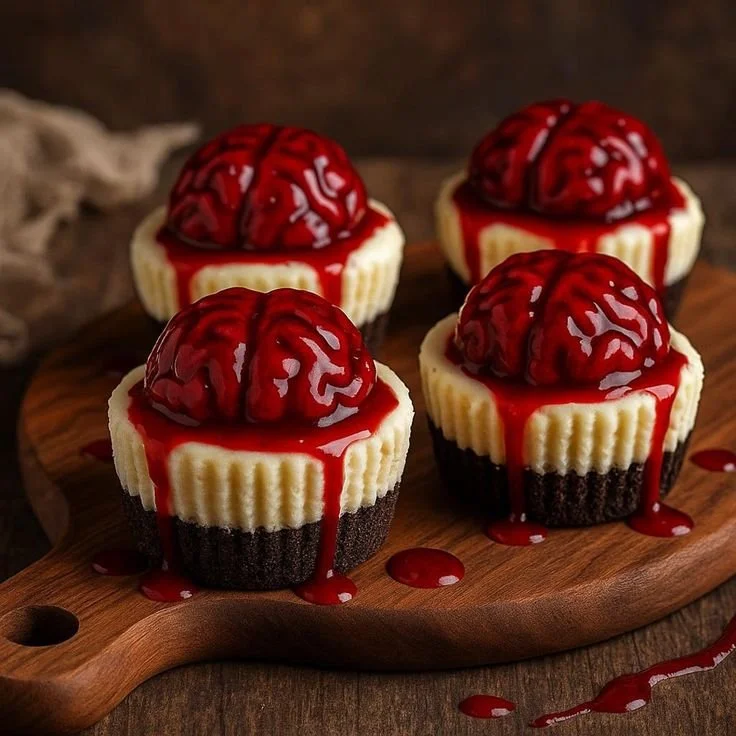
Zombie Brain Cheesecake Bites are the perfect no-bake Halloween dessert to delight your guests and scare up some fun. With their eerie appearance and creamy texture, these treats are sure to be a hit at any spooky celebration. Easy to make and impressive to serve, they provide a delicious way to indulge your Halloween spirit.
Why You’ll Love Zombie Brain Cheesecake Bites
- No Baking Required: These bites come together in just a few simple steps, making them perfect for Halloween party prep.
- Fun Presentation: The brain shape adds a touch of creativity that will excite both kids and adults at your gathering.
- Creamy and Delicious: With a rich cream cheese filling and a crunchy cookie base, every bite is a perfect combination of flavors and textures.
- Customizable Appearance: You can personalize the color of the brain using food coloring, making these bites even more fun and festive.
- Quick to Set: Refrigerate for a couple of hours, and they’re ready to serve—perfect for last-minute preparations.
Recipe Overview
- Prep Time: 30 minutes
- Cook Time: 0 minutes (no baking)
- Total Time: 2-3 hours (including chilling)
- Servings: 12 bites
- Difficulty Level: Easy
Ingredients You’ll Need for Zombie Brain Cheesecake Bites
-
For the Cookie Base:
- 1 cup crushed cookies (like Oreos)
- 2 tablespoons melted butter
-
For the Cream Cheese Filling:
- 4 oz cream cheese, softened
- 1/4 cup sugar
- 1 tsp vanilla extract
- 1 cup whipped cream
-
For Decoration:
- Raspberry sauce for topping
- Food coloring (optional, for a creepy effect)
-
Special Equipment:
- Brain mold or silicone mold
In this recipe, the crushed cookies create a tasty and crunchy base for the creamy cheesecake filling. You can use any chocolate cookie you like, but Oreos work wonderfully. You can adjust the sweetness of the filling by increasing or decreasing the sugar, based on your preference.
How to Make Zombie Brain Cheesecake Bites
-
Prepare the Cookie Base: In a mixing bowl, combine the crushed cookies with melted butter. Stir until fully combined. The mixture should hold together when pressed.
-
Form the Base in Molds: Press the cookie mixture into the bottom of the brain mold evenly to create a solid layer. Make sure it’s tightly packed for a sturdy base.
-
Mix the Cream Cheese Filling: In another bowl, mix the softened cream cheese, sugar, and vanilla extract. Beat until the mixture is smooth and creamy.
-
Incorporate the Whipped Cream: Gently fold in the whipped cream to the cream cheese mixture until fully combined. Be careful not to deflate the whipped cream; it helps create a light texture.
-
Fill the Molds: Spoon the cream cheese mixture into the molds, over the cookie base. Use a spatula to smooth out the tops for an even finish.
-
Chill the Bites: Place the molds in the refrigerator for at least 2-3 hours, or until the cheesecake mixture is firm and set.
-
Unmold the Bites: Once set, carefully remove the cheesecake bites from the molds. If they stick, you can gently twist the mold to help release them.
-
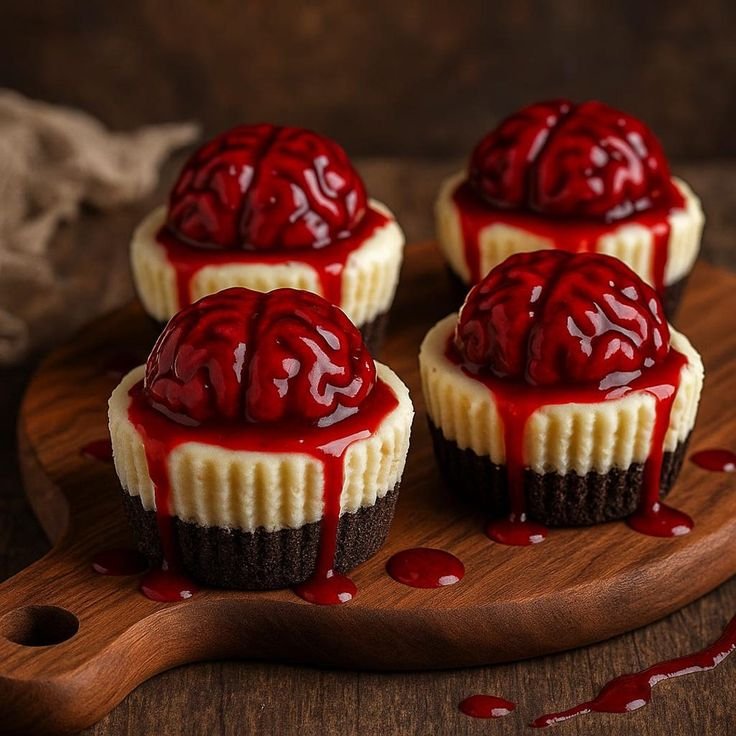
Add Raspberry Sauce: Drizzle raspberry sauce over the top of each cheesecake bite to create a ‘brain’ effect. You can also mix in food coloring into the filling for an extra horror aspect!
-
Serve and Enjoy: Chill again briefly if needed, then serve these spooky bites to your guests and enjoy the reactions!
Tips for Success
- Use Softened Cream Cheese: Make sure your cream cheese is at room temperature for easy mixing. This helps create a smooth filling.
- Whip the Cream Properly: Whip the cream until it forms stiff peaks to ensure the filling is light and airy.
- Avoid Overmixing: When folding in the whipped cream, do so gently to maintain the volume.
- Check Your Molds: Ensure your brain mold is clean and dry before pouring in the cheesecake filling for the best results.
- Presentation Matters: For a fun look, consider creating a drizzle pattern with the raspberry sauce right before serving.
Easy Variations
- Chocolate Base: Swap out the cookie base for a chocolate graham cracker crust for a deeper chocolate flavor.
- Flavor Infusions: Add a bit of lemon juice or zest to the cream cheese filling to brighten up the flavor.
- Dairy-Free Option: Substitute cream cheese and whipped cream with dairy-free versions to make a vegan-friendly treat.
- Fruit Toppings: Replace raspberry sauce with other sauces like strawberry or blueberry to mix up the flavor profile.
- Fun Color: Use different food colors mixed with the cream cheese filling to create a colorful treat that’s not just limited to spooky themes.
What to Serve with Zombie Brain Cheesecake Bites
- Spooky Punch: Pair these bites with a themed punch, like a “witches brew” made with lime sherbet and lemon-lime soda, for a festive drink option.
- Halloween Cookies: Serve with decorated Halloween cookies for a fun dessert platter.
- Fruit Skewers: Fresh fruit skewers provide a refreshing contrast to the creamy cheesecake bites.
- Chocolate-Covered Pretzels: For a salty-sweet combination, chocolate-covered pretzels make a great addition.
Storage and Reheating
- Refrigerator Storage: Store any leftover cheesecake bites in an airtight container in the refrigerator for up to 4 days.
- Freezer Storage: These bites can also be frozen for up to 1 month. Thrill your guests by pulling them out for another special occasion.
- Best Reheating Method: If frozen, thaw them overnight in the refrigerator before serving. Avoid reheating in the microwave, as this can change the texture.
- Meal Prep Note: You can make these bites a day in advance, making them an excellent option for parties and gatherings.
Common Mistakes to Avoid
- Not Softening Cream Cheese: Using cream cheese straight from the fridge can lead to a lumpy filling.
- Overmixing the Filling: Too much mixing can deflate the whipped cream, making the filling denser than desired.
- Insufficient Chilling Time: Skipping the chilling step can result in a filling that doesn’t hold its shape.
- Leaving Cookies Too Coarse: Ensure cookies are finely crushed for a smooth base; large chunks can affect texture.
- Forgetting to Grease Molds: If the molds aren’t greased or if they’re not silicone, you might have trouble removing the cheesecake bites.
Zombie Brain Cheesecake Bites: Background & Cultural Inspiration
The concept of creating spooky treats around Halloween is deeply rooted in festive celebrations worldwide. These Zombie Brain Cheesecake Bites combine the fun of Halloween with the delightful taste of cheesecake. Various cultures celebrate the end of October with festive gatherings, often including themed foods that spark joy and fright. The rise of pop culture in horror films and television further emphasizes this trend, making breathtakingly scary treats an expected highlight of Halloween festivities.
Frequently Asked Questions
Can I make these cheesecake bites ahead of time?
Yes, you can prepare these cheesecake bites up to 2 days in advance. Just store them in the refrigerator until you’re ready to serve.
Can I use a different type of cookie for the base?
Absolutely! Any chocolate cookie or graham cracker can work well for the base. Consider using whatever you prefer or have on hand.
What if I don’t have a brain mold?
If you can’t find a brain mold, you can use any silicone mold or even muffin tins. Just adjust the serving size accordingly.
How can I make the bites less sweet?
Try reducing the sugar in the cream cheese mixture to suit your taste. You can also skip the raspberry sauce or use a less sweet fruit sauce.
How should I store leftovers?
Store leftover bites in an airtight container in the refrigerator for up to 4 days. For longer storage, they can be frozen for a month.
Final Thoughts
Zombie Brain Cheesecake Bites are an easy and playful addition to any Halloween celebration. With their delightful flavor and creative presentation, they’re bound to be a crowd-pleaser. Whether you’re hosting a spooky gathering or just want to enjoy a themed treat, these no-bake bites are worth a try. Embrace the fun of Halloween and whip up a batch to share with family and friends!
PrintZombie Brain Cheesecake Bites
Zombie Brain Cheesecake Bites are the perfect no-bake Halloween dessert that combines creamy cheesecake with a crunchy cookie base for a spooky treat.
- Prep Time: 30 minutes
- Cook Time: 0 minutes
- Total Time: 180 minutes
- Yield: 12 bites
- Category: Dessert
- Method: Chilling
- Cuisine: American
- Diet: Vegetarian
Ingredients
- 1 cup crushed cookies (like Oreos)
- 2 tablespoons melted butter
- 4 oz cream cheese, softened
- 1/4 cup sugar
- 1 tsp vanilla extract
- 1 cup whipped cream
- Raspberry sauce for topping
- Food coloring (optional, for a creepy effect)
Instructions
- Prepare the cookie base: In a mixing bowl, combine the crushed cookies with melted butter. Stir until fully combined.
- Form the base in molds: Press the cookie mixture into the bottom of the brain mold evenly.
- Mix the cream cheese filling: In another bowl, mix the softened cream cheese, sugar, and vanilla extract until smooth.
- Incorporate the whipped cream: Gently fold in the whipped cream to the cream cheese mixture.
- Fill the molds: Spoon the cream cheese mixture into the molds over the cookie base.
- Chill the bites: Place the molds in the refrigerator for at least 2-3 hours.
- Unmold the bites: Carefully remove the cheesecake bites from the molds.
- Add raspberry sauce: Drizzle raspberry sauce over the top of each cheesecake bite.
- Serve and enjoy: Chill again briefly if needed, then serve these spooky bites to your guests.
Notes
Use softened cream cheese for easy mixing and whip the cream until stiff peaks form.












