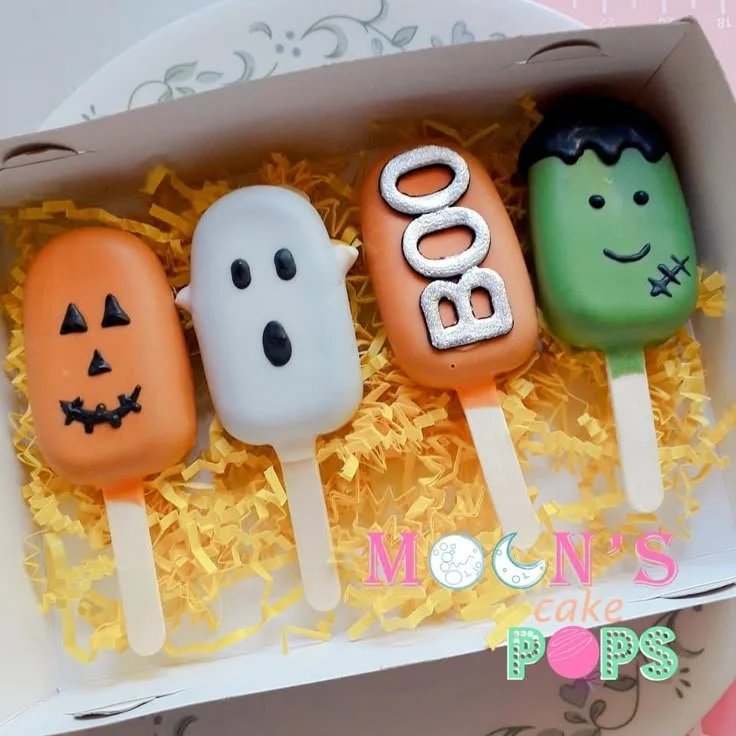
The Spooky Halloween Cake Pops are not only a festive treat but also a fun way to celebrate the spirit of Halloween. These delightful little bites are perfect for parties, school events, or simply to share with family. With vibrant colors and playful designs, they are as fun to make as they are to eat, making them a special addition to your autumn celebrations.
Why You’ll Love Spooky Halloween Cake Pops
- Fun for All Ages: These cake pops are a hit with kids and adults alike. Their whimsical designs make them perfect for Halloween gatherings or family celebrations.
- Easy to Customize: You can easily personalize these cake pops with different colors, designs, and flavors, giving them your unique twist.
- Perfect for Parties: These treats are portable and easy to serve, making them an ideal dessert for parties and get-togethers.
- No-Bake Option: With an easy recipe, these cake pops do not require tricky baking techniques—perfect for beginners.
- Make-Ahead Friendly: You can prepare them in advance, saving you time for other spooky preparations as Halloween approaches.
Recipe Overview
- Prep Time: 30 minutes
- Cook Time: 0 minutes (cool time may vary)
- Total Time: 1 hour (including cooling)
- Servings: Approximately 20 cake pops
- Difficulty Level: Easy
Ingredients You’ll Need for Spooky Halloween Cake Pops
-
Cake:
- 1 box of cake mix (any flavor you prefer, such as chocolate or vanilla)
- 1 container of frosting (store-bought or homemade)
-
Coating:
- 2 cups of chocolate or candy melts (for coating)
- Food coloring (if desired, for creating spooky designs)
-
Decorations:
- Sprinkles (use Halloween-themed sprinkles for extra flair)
- Edible markers (for drawing faces)
- Lollipop sticks (for assembly)
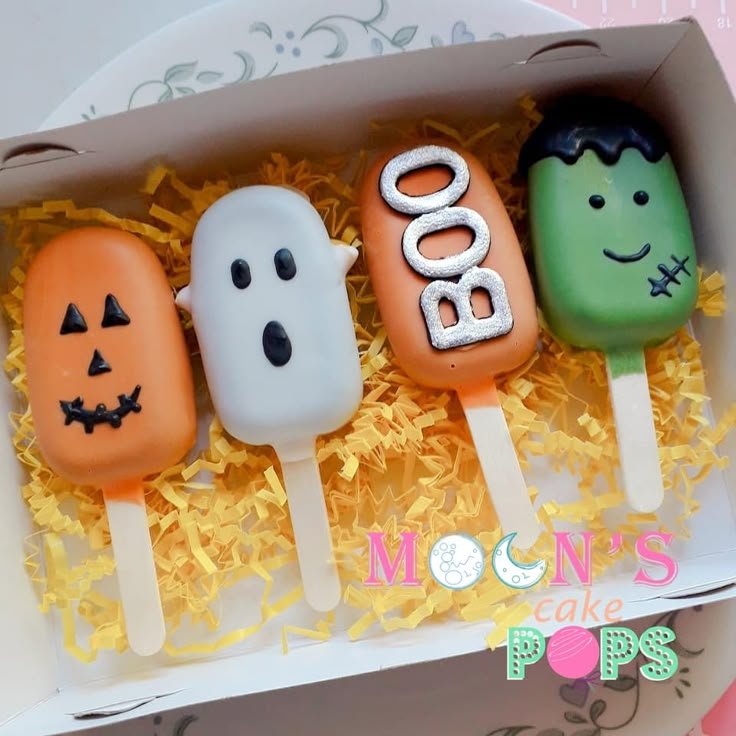
How to Make Spooky Halloween Cake Pops
-
Bake the Cake: Prepare the cake according to the box instructions. Once baked, let it cool completely on a wire rack.
-
Crumble the Cake: Once the cake is cool, crumble it into a large bowl. Make sure there are no large chunks—aim for a fine crumble.
-
Mix with Frosting: Add half of the container of frosting to the crumbled cake. Mix with your hands or a spatula until the mixture is sticky and holds together when pressed.
-
Form the Balls: Scoop out small portions of the mixture and roll them into balls about 1 inch in size. Place the balls on a baking sheet lined with parchment paper.
-
Chill the Cake Pops: Put the baking sheet in the refrigerator for about 30 minutes. This will help the cake pops hold their shape when you dip them.
-
Prepare the Coating: Melt your chocolate or candy melts according to package instructions in a microwave or double boiler. If using, mix in food coloring to achieve your desired shades.
-
Dip and Decorate: Dip the tip of the lollipop stick into the melted chocolate before inserting it into a cake ball. This helps secure the stick. Then, dip the cake pop into the melted chocolate, ensuring it’s fully coated. Tap off excess chocolate.
-
Add Decorations: Before the coating sets, add sprinkles, and decorations, or use edible markers to create spooky faces on the cake pops.
-
Set the Cake Pops: Place the finished cake pops upright in a styrofoam block or a decorated vase to allow the chocolate to harden completely.
Tips for Success
- Adjust the Frosting: If the mixture feels too dry, add more frosting until you achieve the right consistency. It should hold together well but not be overly wet.
- Monitor Melting: Keep an eye on the melting chocolate to avoid burning. Stir frequently while melting to ensure even heating.
- Chill Thoroughly: Don’t skip the chilling step. This helps the cake pops stay intact when being coated.
- Experiment with Flavors: Feel free to use flavored cake mixes or frostings for a unique taste experience.
- Decorate Creatively: Let your imagination run wild with decorations—use any leftover candy or sprinkles to add personality to your cake pops.
Easy Variations
- Pumpkin Spice Cake Pops: Use a pumpkin spice cake mix and cream cheese frosting for a seasonal twist.
- Ghostly Cake Pops: Shape the cake pops into ghost forms and use white chocolate coating with chocolate chips for eyes.
- Chocolate Chip Cake Pops: Add mini chocolate chips to the cake mix for extra texture and flavor.
- Dipped in Candy Corn: After dipping in chocolate, roll the pops in crushed candy corn for a festive crunch.
- Marbled Designs: Use two colors of melts and create a marbled effect by swirling them together in the bowl.
What to Serve with Spooky Halloween Cake Pops
- Hot Chocolate: The sweetness of the cake pops pairs perfectly with a warm, cozy cup of hot chocolate.
- Halloween Snack Mix: Create a mix of popcorn, pretzels, and candy for a crunchy companion to the cake pops.
- Fruit Skewers: Fresh fruit can lighten up the sweetness, offering a refreshing contrast to the rich cake pops.
- Ghostly Cupcakes: Serve alongside cupcakes decorated like ghosts for an extra festive treat.
- Witch’s Brew Punch: A colorful punch with floating gummy worms complements the spooky theme beautifully.
Storage and Reheating
- Refrigerator Storage: Store your cake pops in an airtight container in the refrigerator for up to a week.
- Freezer Storage: Alternatively, you can freeze them for up to three months. Ensure they are well-wrapped to avoid freezer burn.
- Best Reheating Method: There’s no need to reheat cake pops; just thaw them in the fridge overnight before serving.
- Texture Preservation: To maintain freshness, keep them covered and avoid exposure to air.
Common Mistakes to Avoid
- Too Warm to Dip: Dipping the cake pops in chocolate that’s too warm can cause them to lose their shape. Ensure a slightly cooler texture for easier dipping.
- Skipping the Chilling: Not chilling the cake balls before dipping can lead to crumbling. Take the time to let them set properly.
- Overdoing the Frosting: Using too much frosting can make the balls too wet, affecting their ability to hold shape. Use only enough to bind the crumbles.
- Not Tapping Off Excess Chocolate: Forgetting to tap off excess chocolate can result in a messy appearance. Gently tap the stick against the side of your bowl.
Spooky Halloween Cake Pops: Background & Cultural Inspiration
Cake pops have become a popular treat at parties and celebrations, especially around Halloween. The concept of molding cake into different shapes and coating them in chocolate derives from a rich tradition of dessert-making that celebrates creativity and fun in food. In many cultures, festivities are centered around themes of harvest, the supernatural, and seasonal change, making Halloween the perfect occasion to craft playful desserts like spooky cake pops. By blending flavors and techniques, these treats bring people together in celebration of shared traditions and creative expression.
Frequently Asked Questions
Can I use homemade cake for cake pops?
Yes, you can absolutely use homemade cake. Just ensure it is completely cooled and adequately crumbled before mixing with frosting.
What can I use instead of cake mix?
You can make your own cake batter from scratch using simple ingredients like flour, sugar, eggs, and baking powder.
How do I store leftover cake pops?
Store them in an airtight container in the refrigerator for up to a week or freeze them for longer storage.
Can I make these cake pops in advance?
Yes, they are great for meal prep! Make and decorate them a day or two in advance, storing them until you’re ready to serve.
What if my chocolate coating is too thick?
If your chocolate is too thick to dip, add a little vegetable oil or shortening to thin it out while melting.
Final Thoughts
Spooky Halloween Cake Pops are a delightful way to celebrate the season with creativity and flavor. Their playful designs and delicious taste make them a favored treat for gatherings and celebrations. Whether you’re a novice in the kitchen or a seasoned baker, this recipe is approachable and adaptable. Give them a try this Halloween, and watch your family and friends delight in these charming confectionery treats!
PrintSpooky Halloween Cake Pops
These delightful cake pops are festive treats perfect for Halloween gatherings, offering a fun way to celebrate the spooky season.
- Prep Time: 30 minutes
- Cook Time: 0 minutes
- Total Time: 60 minutes
- Yield: 20 cake pops
- Category: Dessert
- Method: No-Bake
- Cuisine: American
- Diet: Vegetarian
Ingredients
- 1 box of cake mix (any flavor)
- 1 container of frosting (store-bought or homemade)
- 2 cups of chocolate or candy melts (for coating)
- Food coloring (optional)
- Sprinkles (Halloween-themed)
- Edible markers (for drawing faces)
- Lollipop sticks (for assembly)
Instructions
- Prepare the cake according to the box instructions. Let it cool completely on a wire rack.
- Crumble the cooled cake into a large bowl until there are no large chunks.
- Add half of the container of frosting to the crumbled cake and mix until sticky.
- Scoop small portions to roll into balls about 1 inch in size. Place on a baking sheet.
- Chill the baking sheet in the refrigerator for about 30 minutes.
- Melt the chocolate or candy melts according to package instructions. Mix in food coloring if desired.
- Dip the tip of a lollipop stick into melted chocolate before inserting it into a cake ball.
- Coat the cake pop in melted chocolate, tapping off the excess.
- Add sprinkles and use edible markers to create faces before the coating sets.
- Set the cake pops upright in a styrofoam block to harden.
Notes
Adjust frosting as needed for consistency, keep a careful watch on melting chocolate, and ensure proper chilling to maintain shape.












