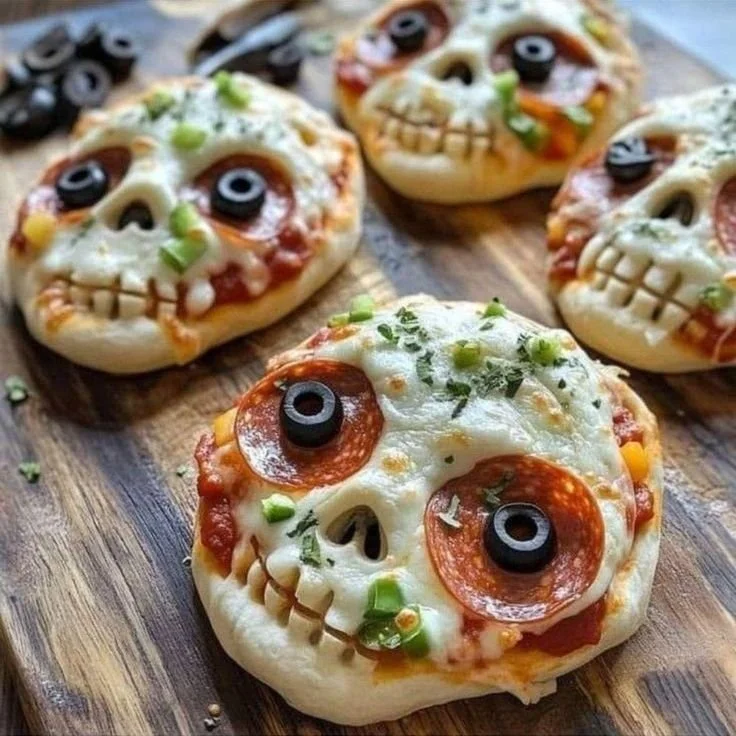
Mini Skull Pizzas are a fun and festive way to celebrate Halloween, making them perfect for parties, family gatherings, or simply a spooky evening treat at home. These adorable mini pizzas not only cater to your taste buds but also appeal to your creativity, allowing you to design each skull with delicious toppings. Easy to make and delicious, this recipe is sure to delight everyone!
Why You’ll Love Mini Skull Pizzas
- Fun Presentation: Shaped like skulls, these pizzas are perfect for Halloween festivities or themed parties, bringing smiles to both kids and adults.
- Easy to Customize: You can easily adjust toppings to suit your family’s preferences or even let everyone decorate their own pizza, making it a fun activity.
- Quick Preparation: With simple ingredients and fast cooking time, you can whip these up in no time, making them a go-to snack or meal.
- Perfect for Meal Prep: These pizzas are great for making ahead of time, so you can store and reheat them when hunger strikes.
- Family-Friendly: Kids love helping to decorate and eat these fun-shaped pizzas, making it a perfect family cooking project.
Recipe Overview
- Prep Time: 15 minutes
- Cook Time: 12-15 minutes
- Total Time: 30 minutes
- Servings: 6 mini pizzas
- Difficulty Level: Easy
Ingredients You’ll Need for Mini Skull Pizzas
- Pizza Dough: Use store-bought or homemade for convenience; the dough creates the base for your skull shape.
- Tomato Sauce: Adds flavor and moisture; feel free to use your favorite pizza or marinara sauce.
- Mozzarella Cheese: This melting cheese is essential for that gooey, delicious topping; opt for fresh mozzarella for a creamier texture.
- Olive Oil: A drizzle over the assembled pizzas enhances flavor and improves browning.
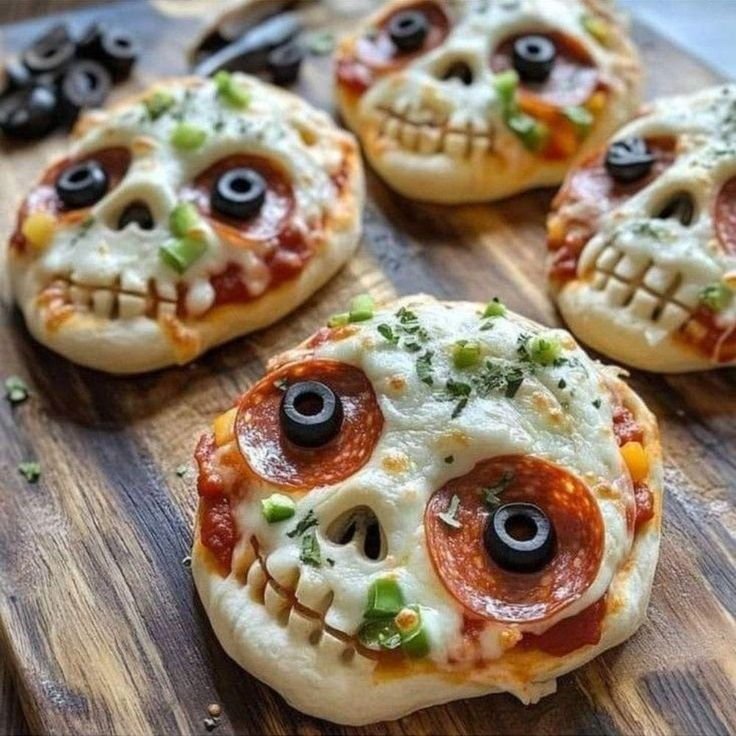
- Black Olives: For decoration; they create spooky eye sockets on the skulls.
- Bell Peppers: Add color and can be shaped to create a fun decorative element on the skulls.
- Italian Seasoning (optional): Sprinkle for added flavor; blends well with the tomato sauce and cheese.
How to Make Mini Skull Pizzas
-
Preheat the Oven
Preheat your oven according to the instructions for the pizza dough, typically around 425°F (220°C). -
Shape the Dough
Roll out the pizza dough on a lightly floured surface. Use a skull-shaped cookie cutter to cut out mini skulls. If you don’t have a skull cutter, any shape will work. -
Prepare the Baking Sheet
Line a baking sheet with parchment paper and place the skull-shaped dough pieces on it, leaving some space in between. -
Add Tomato Sauce
Spread a thin layer of tomato sauce over each skull, ensuring to cover the entire dough surface. -
Sprinkle Cheese
Generously sprinkle shredded mozzarella cheese on top of the sauce, ensuring a good melt and flavor. -
Decorate the Pizzas
Use sliced black olives for eyes and small pieces of bell peppers to create other facial features on the mini skulls. -
Season If Desired
Sprinkle Italian seasoning over the top if you want an extra burst of flavor. -
Bake the Pizzas
Place the baking sheet in the preheated oven and bake until the cheese is bubbling and the edges of the dough are golden brown, about 12-15 minutes. -
Cool and Serve
Remove from the oven and let them cool slightly before serving. Enjoy your spooky mini skull pizzas!
Tips for Success
- Dough Thickness: Roll the dough to an even thickness to ensure uniform baking. Avoid overly thick dough which may result in a doughy texture.
- Topping Mischief: Don’t overload the pizzas with toppings, as too much can make them soggy. Stick to a balanced amount.
- Baking Time: Keep an eye on the pizzas as they bake; oven temperatures may vary. They’re ready when the cheese is bubbling and golden.
- Customization is Key: Feel free to adjust cheese types or add more toppings based on your taste—goat cheese for a tangy twist, for example.
Easy Variations
- Veggie Skulls: Add more vegetables such as mushrooms, spinach, or zucchini for a healthier spin.
- Spicy Kick: Sprinkle red pepper flakes or add sliced jalapeños for those who enjoy a bit of heat.
- Meat Lovers: Top with cooked peppers, sausage, or sliced pepperoni for a heartier option.
- Dairy-Free: Use a dairy-free cheese alternative if needed, ensuring it melts well.
What to Serve with Mini Skull Pizzas
- Salad: A fresh side salad complements the richness of the pizzas and adds a nutritious element.
- Garlic Bread: Serve with garlic breadsticks for a comforting meal together with your pizzas.
- Veggie Platter: Offer a colorful veggie platter for a crunchy contrast and healthy snacking.
- Fruit Skewers: Sweet and fruity skewers can provide a refreshing end to this savory dish.
Storage and Reheating
- Refrigerator Storage: Store leftover mini skull pizzas in an airtight container in the fridge for up to 3 days.
- Freezer Storage: If you want to keep them longer, freeze the unbaked pizzas, wrapping them tightly in plastic wrap and then in foil. They can last for up to 2 months.
- Reheating Method: For best results, reheat in a preheated oven at 350°F (175°C) for about 10 minutes or until warmed through. This helps preserve the crust’s texture.
Common Mistakes to Avoid
- Overbaking: Keep an eye on the pizzas while baking. Over-baked pizzas can dry out and become tough.
- Too Much Sauce: Avoid a soggy crust by spreading sauce evenly but not excessively. A thin layer is ideal.
- Chilling Dough: If using homemade dough, allow it to come to room temperature before rolling out. Cold dough can be hard to shape.
- ** unevenly sized skulls**: Make sure to roll the dough evenly, so all pizzas bake at the same time and get the same texture.
Mini Skull Pizzas: Background & Cultural Inspiration
Mini Skull Pizzas draw inspiration from the fun and festive atmosphere surrounding Halloween, a time when creativity and whimsy reign. This playful approach to food fits perfectly in celebrations where families and friends come together. The skull shape not only injects character but also pays homage to the traditional decorations of Dia de los Muertos, or Day of the Dead, celebrated in many cultures as a way to honor loved ones.
Frequently Asked Questions
Can I use store-bought pizza dough?
Absolutely! Store-bought dough is an easy way to save time, and it works just as well for this recipe.
How long can leftovers be stored?
Leftover mini skull pizzas can be kept in the refrigerator for up to 3 days, or frozen for longer storage.
Can I prepare these pizzas in advance?
Yes, you can prepare and assemble the pizzas in advance, then bake them right before serving.
What if I don’t have a skull cookie cutter?
You can use any shape cookie cutter you have on hand, or simply cut the dough into small circles for regular mini pizzas.
Can I make these pizza gluten-free?
Of course! Use a gluten-free pizza dough option to cater to dietary needs.
Final Thoughts
Mini Skull Pizzas are not just a treat for the taste buds, but also a visual delight that will entertain and satisfy. Whether for a Halloween party or a cozy family dinner, this recipe makes cooking fun and engaging for everyone. So roll up your sleeves, gather your ingredients, and create these spooky delights—it’s a recipe worth trying!
PrintMini Skull Pizzas

Easy-to-make and customizable Mini Skull Pizzas perfect for Halloween festivities or themed parties.
- Prep Time: 15 minutes
- Cook Time: 15 minutes
- Total Time: 30 minutes
- Yield: 6 mini pizzas
- Category: Appetizer
- Method: Baking
- Cuisine: American
- Diet: Vegetarian
Ingredients
- Pizza Dough
- Tomato Sauce
- Mozzarella Cheese
- Olive Oil
- Black Olives
- Bell Peppers
- Italian Seasoning (optional)
Instructions
- Preheat your oven according to the instructions for the pizza dough, typically around 425°F (220°C).
- Roll out the pizza dough on a lightly floured surface. Use a skull-shaped cookie cutter to cut out mini skulls.
- Line a baking sheet with parchment paper and place the skull-shaped dough pieces on it, leaving some space in between.
- Spread a thin layer of tomato sauce over each skull, ensuring to cover the entire dough surface.
- Generously sprinkle shredded mozzarella cheese on top of the sauce.
- Use sliced black olives for eyes and small pieces of bell peppers to create other facial features on the mini skulls.
- Sprinkle Italian seasoning over the top if you want an extra burst of flavor.
- Bake until the cheese is bubbling and the edges of the dough are golden brown, about 12-15 minutes.
- Remove from the oven and let them cool slightly before serving.
Notes
Customize toppings based on preference and keep dough thickness even for uniform baking.












