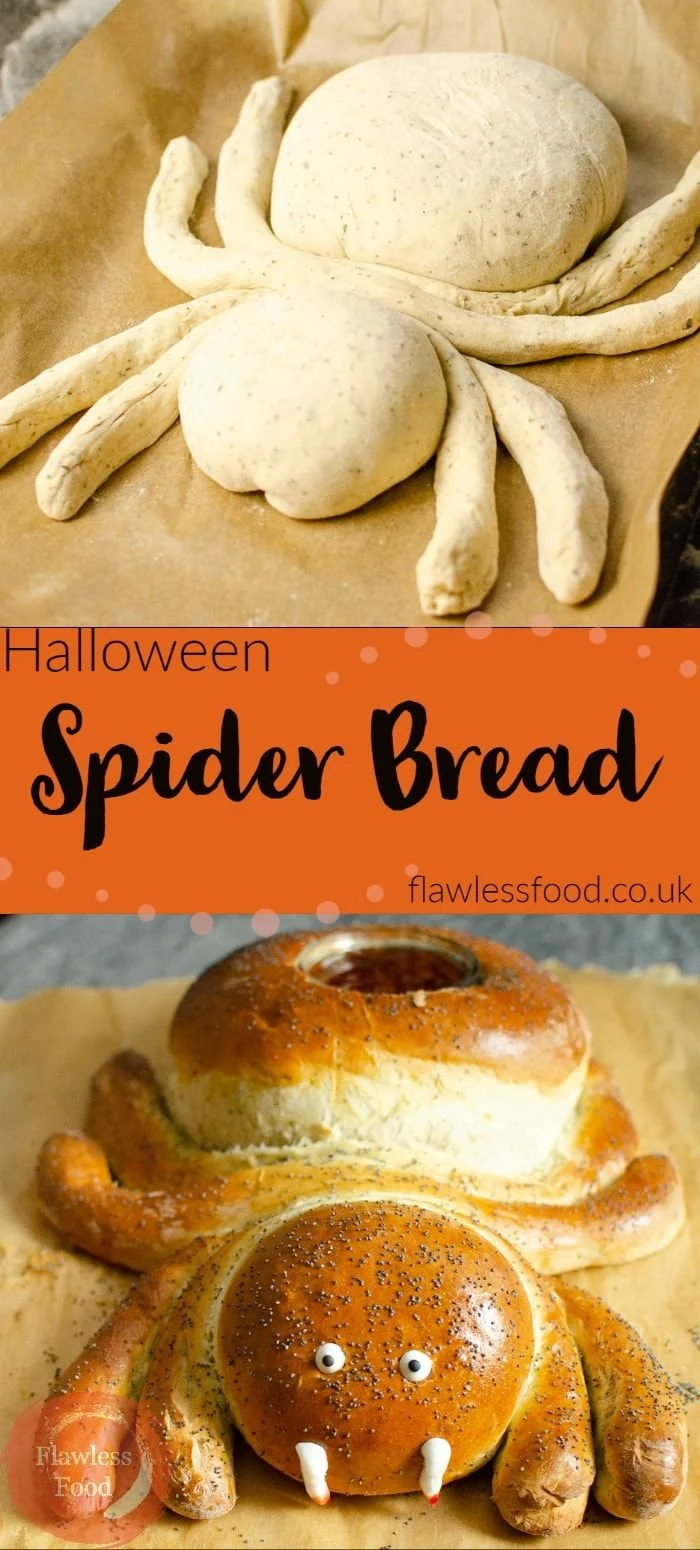
The Spooktacular Halloween Spider Bread is a fun, festive treat that combines creativity with deliciousness. This recipe transforms a simple loaf of bread into an eye-catching Halloween centerpiece that is perfect for parties or family gatherings. Easy to make and even more enjoyable to share, this spooky delight will become a favorite for Halloween celebrations!
Why You’ll Love Spooktacular Halloween Spider Bread
- Easy to Make: With just a few simple steps, even beginners can create this festive bread without any baking experience.
- Visually Appealing: The spider shape makes it an exciting addition to any Halloween spread, capturing the interest of both kids and adults.
- Delicious and Versatile: Serve it warm with your favorite dip, whether it’s hummus, spinach dip, or something sweet like chocolate spread.
- Great for Sharing: This recipe yields enough to feed a crowd, making it a fantastic option for parties or family get-togethers.
- Family-Friendly Fun: Involving kids in the decorating process can make this a delightful family activity, creating memories together in the kitchen.
Recipe Overview
- Prep Time: 10 minutes
- Cook Time: 20 minutes
- Total Time: 30 minutes
- Servings: 8-10
- Difficulty Level: Easy
Ingredients You’ll Need for Spooktacular Halloween Spider Bread
- 1 loaf of bread (round or oval): Choose a sturdy bread that will hold its shape well.
- Olive oil: Adds flavor and helps create a crispy crust.
- Salt: Enhances the flavors of the bread.
- Black olives (for eyes): Adds a fun touch to your bread spider.
- Your choice of dip: Options include hummus, spinach dip, or any preferred dip.
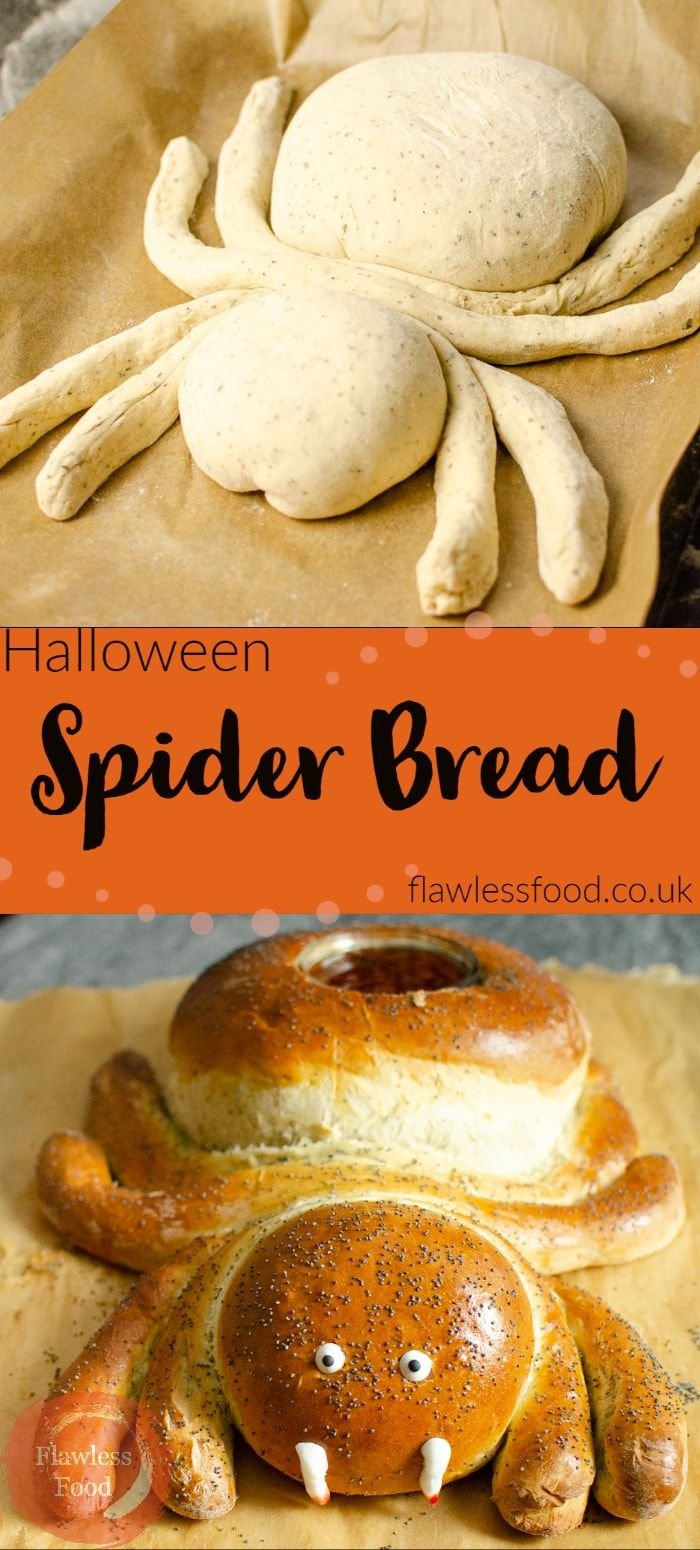
here
How to Make Spooktacular Halloween Spider Bread
-
Preheat the Oven
Set your oven to 350°F (175°C) to ensure it’s hot enough to create a crispy crust. -
Prepare the Loaf
Carefully cut the top part of the loaf to create a ‘head.’ Make sure to carve out a hole in the back where you will place the dip. -
Season the Bread
Drizzle olive oil over the entire surface of the bread, then sprinkle it with salt to enhance the flavor. -
Shape the Spider Legs
Cut slits on either side of the loaf to create spider legs. Gently pull these pieces out slightly to shape them. -
Add Eyes
Place black olives on the ‘head’ of the spider to give it life and character. -
Bake the Bread
Place the spider bread in the preheated oven and bake for about 15-20 minutes, or until golden brown. -
Serve and Enjoy
Once finished, serve the bread warm with your chosen dip placed in the hole at the back. Enjoy the spooky fun!
Tips for Success
- Choose Fresh Bread: Use fresh, good-quality bread for the best flavor and texture.
- Avoid Overbaking: Keep an eye on the bread while baking to prevent it from becoming too hard.
- Customize the Dip: Feel free to experiment with flavored dips that match your theme or preferences.
- Careful Cutting: When creating slits for the legs, don’t cut too deeply; you want the legs to stay attached to the bread.
- Let Cool Slightly: Allow it to cool for a few minutes after baking to make handling easier.
Easy Variations
- Cheesy Spider Bread: Add shredded cheese on top before baking for a cheesy twist.
- Herbed Olive Oil: Infuse the olive oil with garlic or Italian herbs for extra flavor.
- Vegetable Add-Ins: Incorporate chopped vegetables like peppers or onions into your dip for added nutrition and taste.
- Sweet Version: Use a sweet bread and fill it with chocolate spread or cream cheese for a dessert option.
- Pumpkin Flavor: Add pumpkin puree to the dip for a seasonal twist.
What to Serve with Spooktacular Halloween Spider Bread
- Veggie Platter: A colorful array of fresh vegetables pairs nicely and adds a healthy touch.
- Fruit Skewers: Fresh fruit adds sweetness and balances out the savory bread.
- Chips and Salsa: These crunchy snacks make a great side to the creamy dip.
- Mini meatballs: Offer protein and keep with the playful atmosphere of a Halloween gathering.
- Cider or Punch: Serve festive drinks to complete your Halloween table.
Storage and Reheating
- Refrigerator Storage: Store any leftover bread in an airtight container in the fridge for up to 2 days.
- Freezer Storage: You can freeze the bread for longer storage, ideally wrapped tightly in plastic wrap and aluminum foil.
- Reheating: To preserve the crispiness, reheat in an oven at 350°F (175°C) for about 10 minutes.
- Maintain Texture: Avoid microwave reheating as it can make bread rubbery.
Common Mistakes to Avoid
- Cutting Too Deep: Make sure not to cut too deeply for the legs; they should resemble actual spider legs.
- Inadequate Oil: Extra olive oil aids in crispiness; don’t skimp on it.
- Skipping the Seasoning: The salt is essential for enhancing the overall flavor.
- Not Preheating the Oven: Ensure the oven is preheated to get the perfect crust.
- Ignoring Doneness: Keep an eye on the bread to prevent overbaking.
Spooktacular Halloween Spider Bread: Background & Cultural Inspiration
Spooky foods have become a tradition in Halloween celebrations, with creative presentations that delight audiences. In many cultures, seasonal foods represent festivities and community gatherings. Spider Bread embodies this tradition perfectly with its fun motif that encourages creativity and shared experiences. While not a traditional dish per se, the concept of playful, theme-based food has roots in many culinary practices, particularly among families and children celebrating Halloween.
Frequently Asked Questions
Can I use a different type of bread?
Absolutely! While a round or oval loaf works best, any sturdy bread can be used, including sourdough or whole grain.
What dips work best with this recipe?
While hummus and spinach dip are popular choices, feel free to use any dip that you enjoy, such as cheese spreads or guacamole.
Can I make this ahead of time?
You can prepare the bread and create the hollow for the dip in advance, but it’s best to bake it right before serving for optimal freshness.
How can I make this dish spicier?
Add chopped jalapeños or a sprinkle of chili flakes to your dip for an extra kick.
What if I don’t have black olives?
If black olives aren’t available, you can substitute them with small capers or even pieces of bell pepper for the spider’s eyes.
Final Thoughts
The Spooktacular Halloween Spider Bread is not only delightful to look at but also simple to make and delicious to eat. This festive bread is a fantastic way to celebrate Halloween with family and friends, offering a fun experience in the kitchen and at the table. Whether you’re hosting a gathering or enjoying a spooky snack with loved ones, this recipe is sure to be a hit. Give it a try, and enjoy creating memories while indulging in this fun and tasty treat!
PrintSpooktacular Halloween Spider Bread
A fun and festive treat that transforms a simple loaf of bread into a spooky centerpiece perfect for Halloween parties.
- Prep Time: 10 minutes
- Cook Time: 20 minutes
- Total Time: 30 minutes
- Yield: 8-10 servings
- Category: Appetizer
- Method: Baking
- Cuisine: American
- Diet: Vegetarian
Ingredients
- 1 loaf of bread (round or oval)
- 2 tablespoons olive oil
- 1 teaspoon salt
- Black olives (for eyes)
- Your choice of dip (hummus, spinach dip, chocolate spread, etc.)
Instructions
- Preheat the oven to 350°F (175°C).
- Prepare the loaf by cutting the top part to create a ‘head’ and carving out a hole in the back for the dip.
- Season the bread by drizzling olive oil over it and sprinkling salt.
- Shape the spider legs by cutting slits on either side, then gently pulling them out.
- Add black olives on the ‘head’ for the eyes.
- Bake for about 15-20 minutes, or until golden brown.
- Serve warm with your chosen dip in the hole.
Notes
Involving kids in the decorating process can create fun memories. Customize the dip to match your theme!












