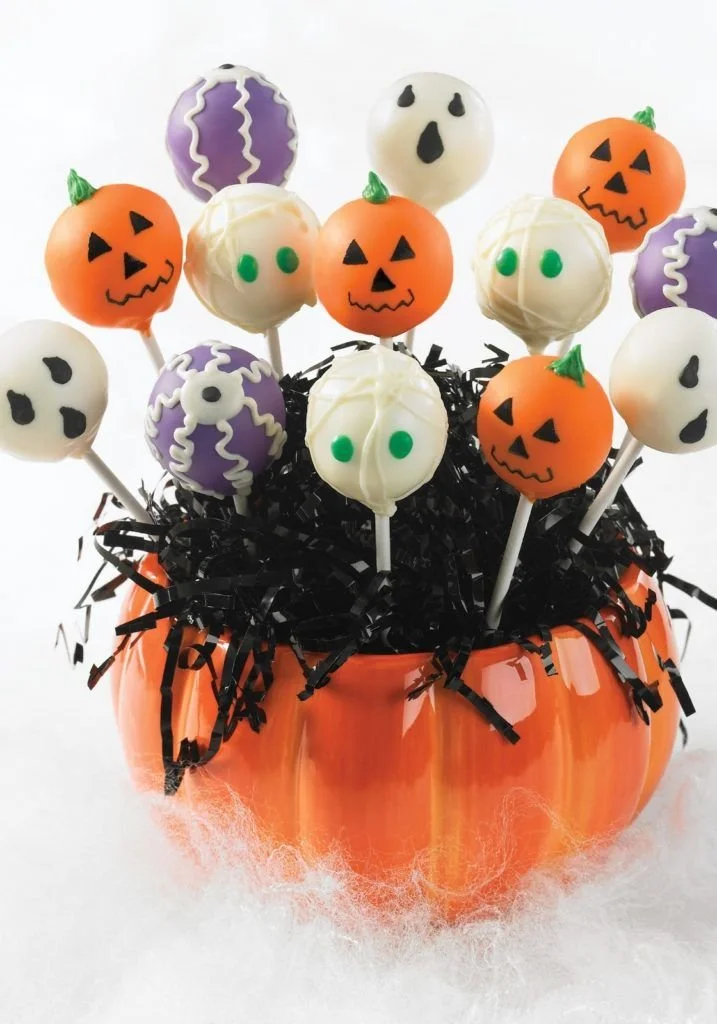
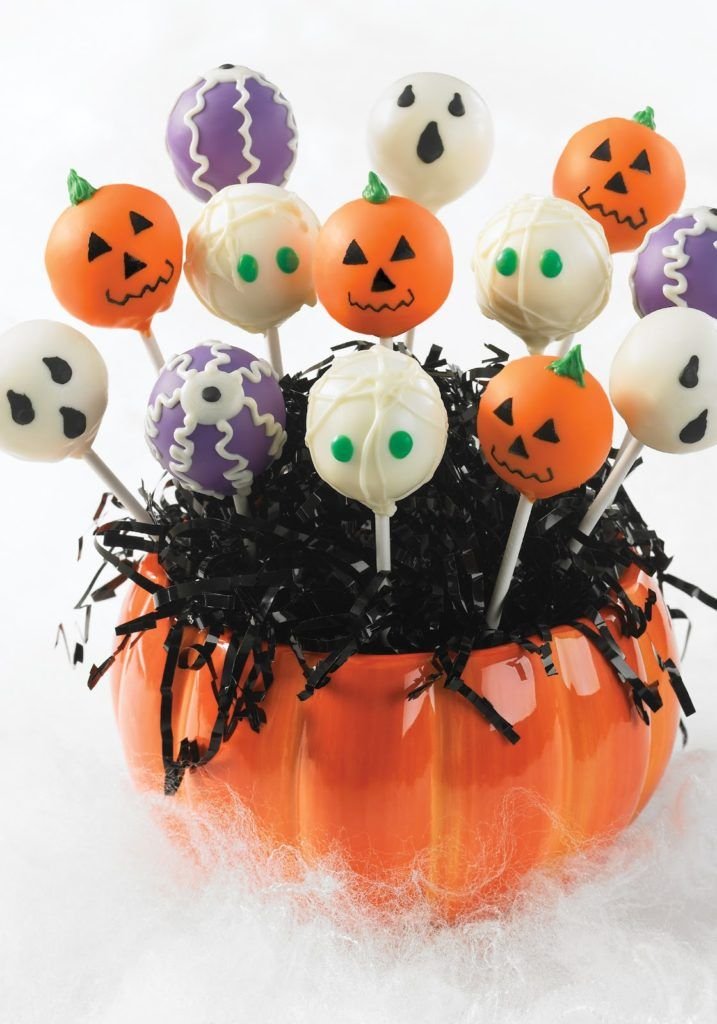
Creating easy and delightful bites can be a real treat, and these Halloween Cake Pops are a perfect way to celebrate the spooky season. Fun to make and even more enjoyable to eat, these cake pops are a hit with kids and adults alike. They’re a playful way to add a festive touch to your Halloween festivities, whether for a party or just a fun family activity.
Why You’ll Love Halloween Cake Pops
- Easy to Make: Even if you’re new to baking, these cake pops are straightforward, involving simple steps that are hard to mess up.
- Customizable: You can decorate them in countless ways, from cute ghosts to eerie monsters, letting your creativity shine.
- Perfect for Sharing: Cake pops are neat, easy to handle, and make great treats for parties or classroom events without the mess of traditional cake slices.
- Great for Kids: Kids love decorating their own cake pops, making this a fun and interactive family activity.
- Make Ahead: These treats can be prepped in advance, saving you time on the day of your gathering.
Recipe Overview
- Prep Time: 30 minutes
- Cook Time: 25 minutes
- Total Time: 55 minutes (plus cooling time)
- Servings: 12 to 16 cake pops
- Difficulty Level: Easy
Ingredients You’ll Need for Halloween Cake Pops
- Cake:
- 1 box of chocolate or vanilla cake mix (plus ingredients required by the mix)
- Frosting:
- 1 cup ready-made frosting (chocolate or vanilla works well)
- Candy Coating:
- 12 oz chocolate or candy melts (found in various colors)
- Popsicle Sticks or Lollipop Sticks
- Sprinkles or Decorating Supplies:
- Orange and black sprinkles, edible eyes, or candy decorations for Halloween styling
How to Make Halloween Cake Pops
-
Bake the Cake:
Prepare the cake mix according to the package instructions and bake in a 9×13-inch pan. Allow it to cool completely before handling. -
Crumble the Cake:
Once cooled, crumble the cake into a large bowl. You want fine crumbs—this will help your cake pops hold together. -
Mix in the Frosting:
Add the frosting to the crumbled cake, mixing well with your hands until fully incorporated. The mixture should be moist but not overly sticky. -
Shape the Cake Pops:
Scoop a tablespoon of the cake mixture and roll it into a ball. Place all formed balls onto a baking sheet lined with parchment paper. -
Insert the Sticks:
Melt a small amount of candy coating, then dip the end of the stick into the melted candy before inserting it into each ball. This helps the stick stay in place. Refrigerate for about 30 minutes to let the pops firm up. -
Melt the Candy Coating:
While the pops chill, melt the remaining candy coating in a microwave or on a double boiler, stirring until smooth. -
Coat the Cake Pops:
Dip each cake pop into the melted candy coating, making sure to coat it entirely. Allow excess coating to drip off before setting it back on the parchment paper. -
Decorate Your Pops:
While the coating is still wet, add sprinkles or other decorations. If using edible eyes, gently press them onto the coating before it hardens. -
Let Set:
Allow the cake pops to sit at room temperature or refrigerate until the coating is fully set.
Tips for Success
- Ensure the cake is completely cooled before crumbling to avoid a gooey texture.
- Don’t overmix the cake and frosting; a thoroughly combined mixture will help the pops hold their shape.
- If the mixture is too dry, add additional frosting a tablespoon at a time until the right texture is achieved.
- When coating the pops, make sure the candy melts are not too hot to prevent melting the cake ball.
- Use a tall glass or a block of styrofoam to help hold the cake pops upright while they set.
Easy Variations
- Chocolate Coating: Use white chocolate for a spooky skeleton effect by drizzling with dark chocolate.
- Flavor Twist: Experiment with different cake flavors like red velvet or lemon for unique taste.
- Stuffed Cake Pops: Add a surprise filling of jam or fruit puree in the center of the cake ball for a fun twist.
- No-Stick Method: Use mini cupcakes to create a cake pop effect without needing to shape and stick.
- Dairy-Free Option: Use dairy-free cake mix and frosting for a vegan-friendly version.
What to Serve with Halloween Cake Pops
- Hot Cocoa: Serve with steaming mugs of hot cocoa for a cozy treat that complements the festive theme.
- Fruit Salads: A light fruit salad can balance the sweetness of the cake pops while keeping it refreshing.
- Ghostly Cupcakes: Pair these cake pops with cupcakes decorated as ghosts for a fun dessert table.
- Spooky Cookies: Incorporate Halloween-themed cookies, like pumpkin sugar cookies, to diversify your dessert selection.
Storage and Reheating
- Refrigerator Storage: Store cake pops in an airtight container in the fridge for up to one week.
- Freezer Storage: For longer storage, you can freeze cake pops before decorating. Simply wrap them individually in plastic wrap and place them in a freezer-safe bag for up to three months.
- Reheating: When ready to serve, allow them to thaw at room temperature. Avoid reheating as this may cause the coating to melt and lose texture.
Common Mistakes to Avoid
- Not letting the cake cool completely before crumbling, leading to a mushy mixture.
- Using chocolate that’s too thick for dipping, making it difficult to coat the pops evenly.
- Overcrowding the baking sheet with cake pops, which can cause them to stick together.
- Not refrigerating the pops long enough, resulting in pops that may fall apart when dipped.
- Neglecting to tap off excess candy coating, leading to a thick layer that may not set properly.
Halloween Cake Pops: Background & Cultural Inspiration
Halloween cake pops draw inspiration from the whimsical nature of the Halloween season. Cake pops themselves gained popularity during the early 2000s, rapidly becoming a staple in modern dessert tables due to their ease of serving and versatility. The tradition of decorating treats for holidays dates back centuries, with Halloween providing a colorful backdrop for creative culinary expression. These fun treats bring families together, becoming a cherished activity each autumn as they celebrate the festive spirit of Halloween.
Frequently Asked Questions
Can I use a homemade cake recipe instead of a box mix?
Absolutely! A homemade cake recipe works just as well; just be sure it has a light and fluffy texture.
How can I get the candy coating to be smooth?
Make sure to melt the candy coating gently and stir until smooth. You can also add a small amount of vegetable oil to thin it out if necessary.
How far in advance can I make cake pops?
You can make cake pops up to a week in advance if stored properly in an airtight container.
Can I make these gluten-free?
Yes, use a gluten-free cake mix and ensure that all coatings and decorations are gluten-free.
What’s the best way to transport cake pops?
Place them upright in a cake pop stand or a foam block for safe transportation to events.
Final Thoughts
Halloween Cake Pops are not just a treat; they’re a festive way to enjoy baking and creativity with friends and family. With their ease of preparation and endless decorating possibilities, they’re ideal for any spooky celebration. Whether you’re hosting a party or simply looking to indulge in some holiday fun, these adorable cake pops will surely delight everyone. So gather your ingredients and let your imagination run wild in the kitchen!
PrintHalloween Cake Pops
Easy and delightful Halloween Cake Pops that are fun to make and decorate, perfect for parties or family activities.
- Prep Time: 30 minutes
- Cook Time: 25 minutes
- Total Time: 55 minutes
- Yield: 12 to 16 cake pops
- Category: Dessert
- Method: Baking
- Cuisine: American
- Diet: Vegetarian
Ingredients
- 1 box of chocolate or vanilla cake mix (plus ingredients required by the mix)
- 1 cup ready-made frosting (chocolate or vanilla)
- 12 oz chocolate or candy melts (in various colors)
- Popsicle sticks or lollipop sticks
- Sprinkles or decorating supplies (orange and black sprinkles, edible eyes, candy decorations)
Instructions
- Prepare the cake mix according to the package instructions and bake in a 9×13-inch pan. Allow it to cool completely before handling.
- Crumble the cooled cake into a large bowl until you have fine crumbs.
- Add the frosting to the crumbled cake, mixing until fully incorporated. The mixture should be moist but not overly sticky.
- Scoop a tablespoon of the mixture and roll it into a ball. Place onto a baking sheet lined with parchment paper.
- Dip the end of each stick into melted candy coating before inserting it into each ball to help it stay in place. Refrigerate for about 30 minutes.
- Melt the remaining candy coating in a microwave or double boiler, stirring until smooth.
- Dip each cake pop into the melted candy coating, allowing excess to drip off before placing back on the parchment paper.
- Add sprinkles or decorations while the coating is still wet.
- Allow the cake pops to set at room temperature or refrigerate until fully set.
Notes
Ensure the cake is completely cooled before crumbling to avoid a gooey texture. Use a tall glass or foam block to hold the cake pops while they set.












