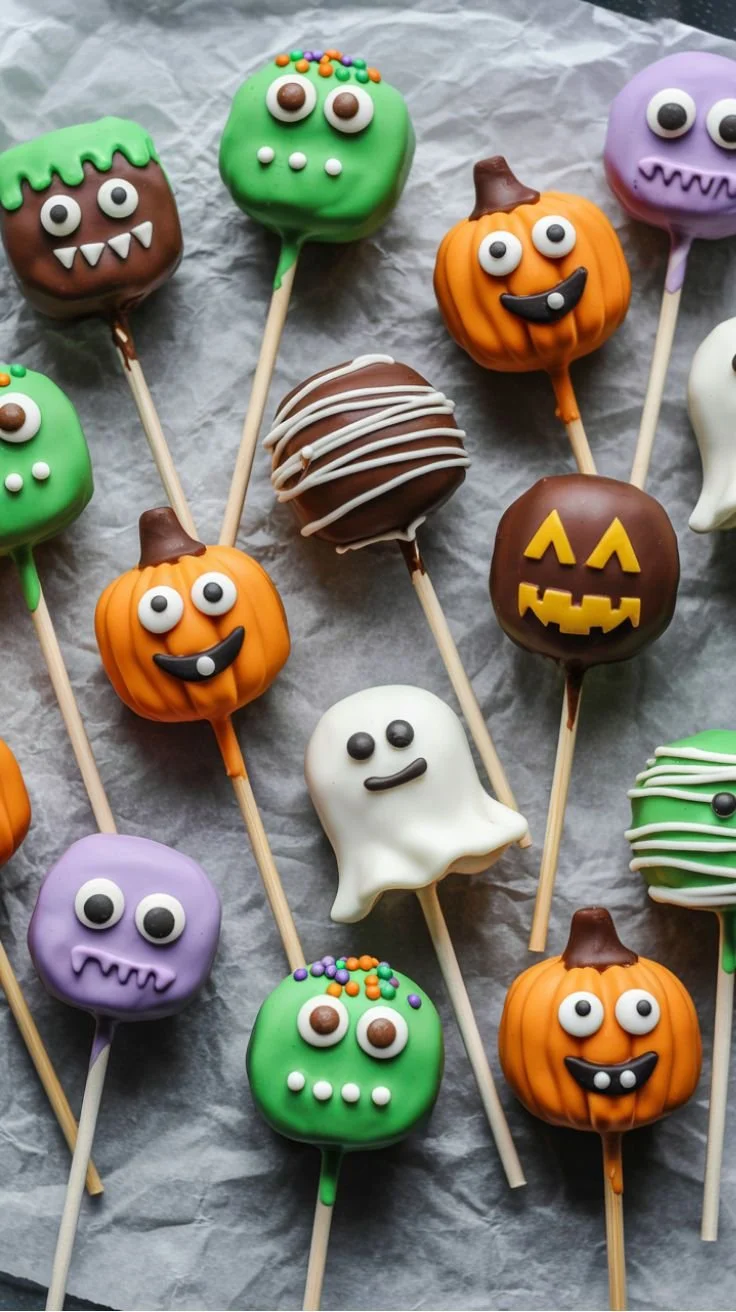
Making Easy Halloween Cake Pops is the perfect way to add some spooky fun to your celebrations! These delightful treats are not only easy to prepare but are also a hit with both kids and adults. With just a few simple ingredients, you can create festive cake pops that will brighten up any Halloween gathering.
Why You’ll Love Easy Halloween Cake Pops
- Fun for All Ages: These cake pops are a treat that engages everyone, making them ideal for family gatherings, school parties, or Halloween celebrations.
- Simple Preparation: Using a boxed cake mix makes the baking process quick and straightforward, perfect for beginners or busy schedules.
- Customizable Decorations: You can unleash your creativity with various sprinkles and chocolate melts, allowing for your own unique twist on the classic dessert.
- No Special Equipment Required: You can make these pops easily at home without needing specialized tools—just a few basic kitchen items are enough.
- A Sweet Treat with a Spooky Twist: Their playful appearance makes these cake pops a festive addition to your Halloween festivities, sure to impress your guests.
Recipe Overview
- Prep Time: 20 minutes
- Cook Time: 30 minutes
- Total Time: 50 minutes (plus freeze time)
- Servings: 12-15 cake pops
- Difficulty Level: Easy
Ingredients You’ll Need for Easy Halloween Cake Pops
-
For the Cake:
- 1 box chocolate cake mix (for a rich, chocolatey flavor)
-
For the Frosting:
- 1 cup ready-made chocolate frosting (to bind the cake and add sweetness)
-
For the Coating:
- 1 lb chocolate melts (choose orange, black, or white for a Halloween theme)
-
Extras:
- Lollipop sticks (to create fun cake pops)
- Sprinkles or decorations (optional, for that festive touch)
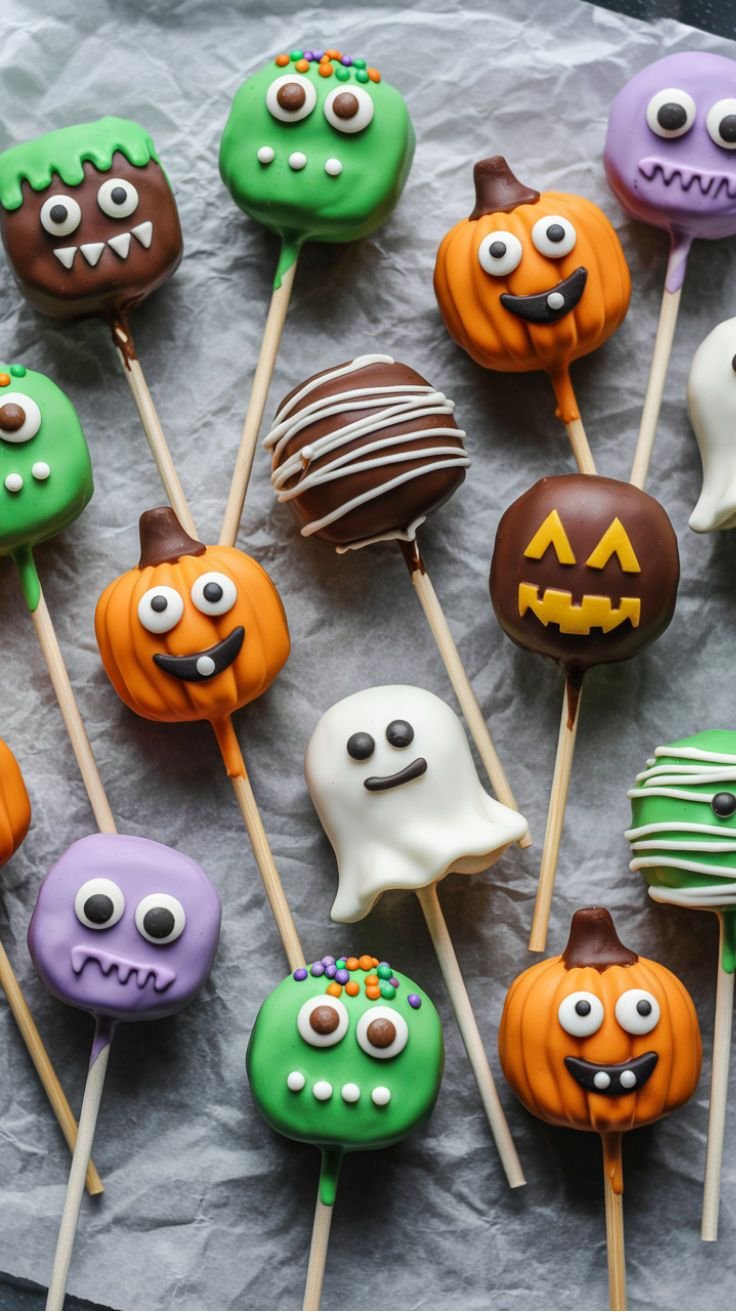
How to Make Easy Halloween Cake Pops
-
Bake the Cake: Prepare the chocolate cake according to the package instructions. Once baked, allow it to cool completely on a wire rack.
-
Crumble the Cake: In a large bowl, crumble the cooled cake into fine pieces.
-
Mix with Frosting: Add the chocolate frosting to the crumbled cake and mix until well combined. The mixture should hold together easily when formed into balls.
-
Form Cake Balls: Shape the mixture into small balls—about 1 inch in diameter. Place them on a baking sheet lined with parchment paper.
-
Insert Sticks and Freeze: Gently insert a lollipop stick into each cake ball. Freeze the cake pops for about 30 minutes until they are firm.
-
Melt the Chocolate: In a microwave-safe bowl, melt the chocolate melts in 30-second intervals, stirring until smooth.
-
Dip the Cake Pops: Dip each cake pop into the melted chocolate, allowing any excess to drip off.
-
Decorate: While the chocolate is still wet, sprinkle with your choice of decorations.
-
Set the Pops: Stand the cake pops upright in a Styrofoam block or a holder until the chocolate has set completely.
-
Enjoy: Once set, your Halloween cake pops are ready to be enjoyed!
Tips for Success
- Cool Completely: Ensure the cake is cooled before crumbling for the best texture.
- Avoid Melting: Keep the dipped cake pops in the freezer for a few minutes before decorating to help the chocolate set quickly.
- Consistency: If the cake mixture is too dry, add a bit more frosting; if too wet, add a little more cake.
- Do Not Overheat Chocolate: Melt your chocolate melts with care; overheating can cause it to seize up.
- Experiment with Flavors: Consider adding a pinch of cinnamon or orange zest for a seasonal twist.
Easy Variations
- Flavor Swap: Use vanilla or red velvet cake mix for a different flavor foundation.
- Decorative Coatings: Roll the finished pops in crushed nuts, edible glitter, or coconut flakes for varied textures.
- Themed Designs: Use edible markers to draw fun Halloween faces directly on the chocolate coating.
- Nutritional Bump: Mix in mini chocolate chips or bits of candy corn into the cake mix for added texture and flavor.
- Dairy-Free Option: Opt for dairy-free chocolate melts and frosting for a suitable alternative.
What to Serve with Easy Halloween Cake Pops
- Hot Chocolate: A warm drink complements the sweetness of the cake pops perfectly.
- Halloween Cookies: Pairing with fun Halloween-themed cookies adds to the festive display.
- Fruit Skewers: Serving fresh fruit provides a refreshing contrast to the sweetness.
- Milkshake: Something cold and creamy balances the rich cake pops nicely.
- Candy Corn: This classic Halloween candy makes for a nostalgic and colorful side.
Storage and Reheating
- Refrigerator Storage: Store uneaten cake pops in an airtight container in the refrigerator for up to a week.
- Freezer Storage: These cake pops can be frozen for up to two months. Just ensure they are wrapped well to avoid freezer burn.
- Best Reheating Method: If frozen, let them thaw in the fridge. Avoid reheating to preserve the chocolate coating.
- Texture Preservation: To maintain moisture, don’t expose the cake pops to air for too long.
Common Mistakes to Avoid
- Undermixing: Failing to mix the frosting and cake well can result in inconsistent texture.
- Not Freezing Long Enough: Skipping the freeze step can lead to wobbly pops that don’t hold their shape while dipping.
- Chocolate Too Hot: Dipping cake pops in overly hot chocolate can cause them to melt before setting.
- Skipping the Parchment Paper: Not lining the baking sheet can lead to stuck cake pops that are difficult to remove.
- Not Letting Chocolate Set: Be patient and allow the chocolate coating to firm up completely before handling.
Easy Halloween Cake Pops: Background & Cultural Inspiration
Cake pops have gained immense popularity over the past decade for their playful presentation and delicious taste. Originating from bakery innovations, these treats blend convenience with creativity. By utilizing a boxed cake mix, they have become an accessible dessert option for home bakers. The festive twist for Halloween not only ensures enjoyment but also invites artistic expression through decoration, capturing the excitement of the holiday.
Frequently Asked Questions
Can I use homemade cake instead of a boxed mix?
Yes! While a boxed mix is convenient, using a homemade cake mix adds a personal touch. Ensure it’s a similar flavor and texture.
How long can I store cake pops?
Cake pops can be stored in the refrigerator for up to a week or they can be frozen for up to two months when properly sealed.
Can I make these ahead of time?
Absolutely! Cake pops can be made in advance and stored in the freezer. Just thaw them in the fridge before serving.
What can I do if my chocolate isn’t coating properly?
If the chocolate is too thick, try adding a small amount of vegetable oil or shortening to thin it out for easier dipping.
Can I make these gluten-free?
Yes, use a gluten-free chocolate cake mix and ensure that any additional ingredients, such as the chocolate melts and frosting, are also gluten-free.
Final Thoughts
Making Easy Halloween Cake Pops is a delightful way to celebrate the spooky season with a fun and tasty treat. With simple ingredients and straightforward instructions, even beginner bakers can create these festive pops. Don’t hesitate to get creative with your decorations and enjoy sharing these treats with friends and family. Get ready for some “boo-tiful” cake pops that will surely be the highlight of your Halloween festivities!












