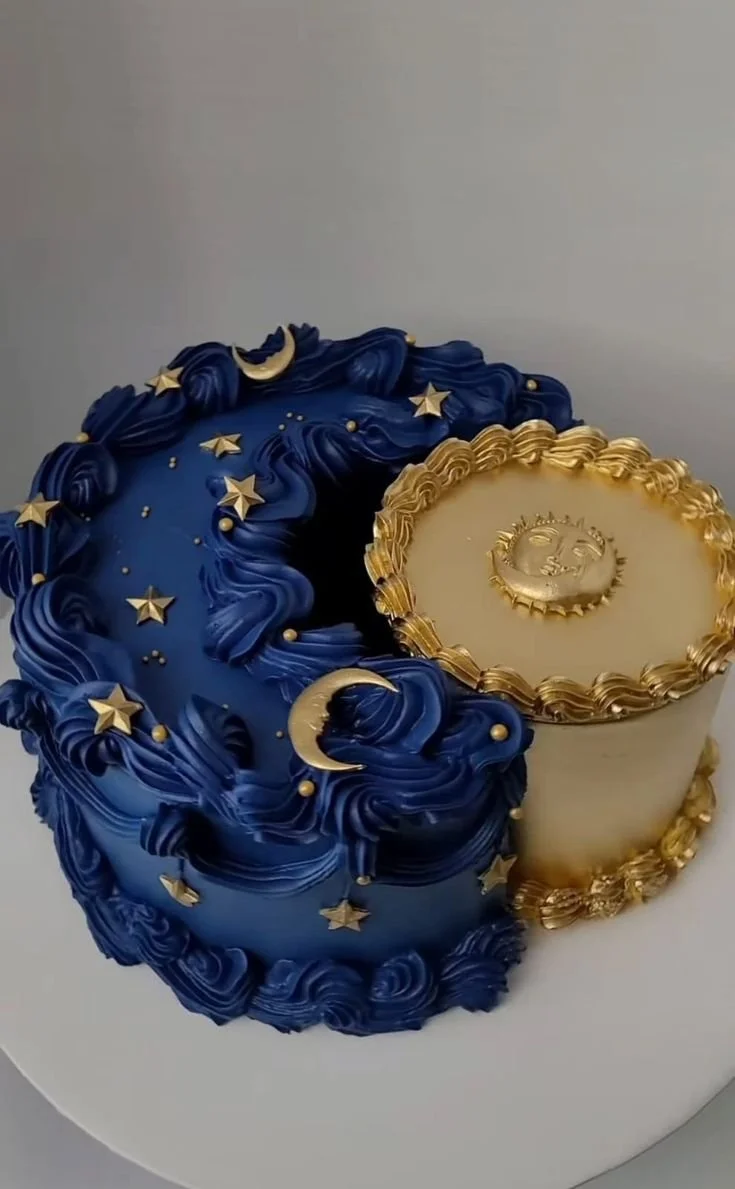
Layer Cake Soleil & Lune – Pastel Sol y Luna is a delightful dessert that captivates both the eyes and the palate. With its striking layers and vibrant colors, this cake is not only beautiful but also an inviting treat for gatherings, celebrations, or simply a weekend baking project. Its rich flavors and moist texture make it a memorable centerpiece for any dessert table.
Why You’ll Love Layer Cake Soleil & Lune
- Visual Delight: The stunning layers of colors create an eye-catching presentation that delights guests and family alike.
- Customizable: You can easily adjust the flavors and colors to suit your preferences or seasonal ingredients.
- Perfect for Celebrations: Whether it’s a birthday, anniversary, or a special gathering, this cake is a showstopper.
- Moist and Flavorful: Each layer is infused with flavors that come together beautifully, making every bite satisfying.
- Fun to Make: Layering and decorating allows for creativity, making it an enjoyable process for both new and experienced bakers.
Recipe Overview
- Prep Time: 30 minutes
- Cook Time: 25 minutes
- Total Time: 55 minutes
- Servings: Serves 10-12
- Difficulty Level: Intermediate
Ingredients You’ll Need for Layer Cake Soleil & Lune
-
For the Cake:
- 2 ½ cups all-purpose flour
- 2 cups granulated sugar
- 1 cup unsalted butter, softened
- 1 cup milk
- 4 large eggs
- 1 tablespoon baking powder
- 1 teaspoon vanilla extract
- Food coloring (yellow and blue for layers)
-
For the Frosting:
- 1 cup unsalted butter, softened
- 4 cups powdered sugar
- 1/4 cup heavy cream
- 1 teaspoon vanilla extract
- Optional sprinkles for decoration
(Always add 
here)
How to Make Layer Cake Soleil & Lune
-
Prepare the Oven and Pans: Preheat your oven to 350°F (175°C). Grease and flour three 9-inch round cake pans. This step ensures the cakes come out easily.
-
Mix the Cake Batter: In a large mixing bowl, cream the butter and sugar together until light and fluffy. This should take about 5 minutes. Then, add the eggs one at a time, mixing well after each addition. Stir in the vanilla.
-
Combine Dry Ingredients: In a separate bowl, whisk together the flour and baking powder.
-
Add Dry to Wet: Gradually combine the dry ingredients with the wet mixture, alternating with the milk. Start and end with the dry ingredients. Mix until just combined.
-
Divide the Batter: Split the batter into two bowls. Colour one bowl yellow and the other blue with food coloring to achieve your desired shades.
-
Bake the Layers: Pour the yellow batter into one of the prepared pans and the blue batter into another. Bake in the preheated oven for 20-25 minutes or until a toothpick inserted in the center comes out clean. Allow the cakes to cool in the pans for 10 minutes, then turn them out onto wire racks to cool completely.
-
Make the Frosting: In a clean bowl, beat the softened butter until creamy. Gradually add powdered sugar and mix well. Add the heavy cream and vanilla extract, beating until the frosting is fluffy and spreadable.
-
Assemble the Cake: Place the yellow cake layer on a serving plate. Spread a layer of frosting on top, then add the blue layer. Repeat the process, finishing with the final yellow layer on top.
-
Decorate: Use the remaining frosting to cover the entire cake. Add sprinkles on top for a festive touch. The decoration is your chance to get creative!
-
Slice and Serve: Once decorated, slice into the cake and serve. Enjoy the beautiful layers and delightful flavors!
Tips for Success
- Even Layers: Use a scale to ensure your cake layers are the same size for a balanced look.
- Cool Completely: Always let your cake layers cool completely before frosting to prevent melting.
- Color Mixing: Start with a little food coloring and add more until you achieve the desired shade; it’s easier to darken than to lighten.
- Frosting Tips: For a smoother finish on frosting, dip your spatula in warm water before spreading.
- Layer Stability: Chill the assembled cake in the refrigerator for about 20-30 minutes before serving. This helps to set the layers and makes cutting easier.
Easy Variations
- Flavor Variations: Swap the vanilla extract for almond or lemon extract for a different flavor profile.
- Fruit Add-ins: Add colorful fruit jam between the layers for a fruitier flavor.
- Chocolate Option: Incorporate cocoa powder into the recipe for a chocolate layer, alternating colors.
- Nutty Layer: Mix finely chopped nuts into the batter for added texture and flavor.
- Vegan Substitute: Use plant-based butter, almond or oat milk, and flax eggs for a vegan version of this cake.
What to Serve with Layer Cake Soleil & Lune
- Fresh Fruits: A side of fresh berries or a fruit salad complements the sweetness of the cake.
- Iced Tea or Lemonade: A refreshing drink can balance the richness of the cake and keep guests hydrated.
- Coffee or Tea: Both of these beverages offer a warm pairing and enhance the cake’s flavors.
- Whipped Cream: A dollop of whipped cream can enhance the cake with added creaminess and a touch of luxury.
Storage and Reheating
- Refrigerator Storage: Keep leftover cake in an airtight container in the refrigerator for up to 4 days.
- Freezer Storage: If you need to, you can freeze individual slices wrapped tightly in plastic wrap for up to 3 months.
- Reheating Method: For a warm slice, microwave for about 10-15 seconds. Ensure not to overheat, as this can dry out the cake.
- Meal Prep Note: You can bake and freeze the cake layers ahead of time. Frost just before serving for best results.
Common Mistakes to Avoid
- Not Prepping Pans: Failing to grease and flour the pans can lead to cake sticking.
- Overmixing Batter: Overmixing can result in a dense cake. Mix just until combined for a light texture.
- Skipping the Cooling Step: Frosting warm cake layers will melt the frosting, resulting in a mess.
- Incorrect Baking Time: Always check for doneness; baking times can vary based on your oven.
- Ignoring Ingredient Temperature: Ensure all ingredients are at room temperature for better mixing.
Layer Cake Soleil & Lune: Background & Cultural Inspiration
Layer Cake Soleil & Lune artfully blends vibrant colors and festive spirit, inspired by the celebration of life and nature. Often found at various festive occasions in Latin American countries, this cake embodies the joyous nature of gatherings. Its name, which translates to “Sun and Moon Cake,” represents balance and harmony in celebrations. The tradition of using bold colors in desserts reflects the region’s vibrant culture, making this cake not just a treat but a symbol of togetherness and joy.
Frequently Asked Questions
Can I use other food colorings for this cake?
Yes! Feel free to use gel food coloring or natural food dyes for different shades and variations.
How long can I store the cake?
You can store it in an airtight container in the refrigerator for up to 4 days and freeze slices for up to 3 months.
How can I make the cake gluten-free?
You can substitute all-purpose flour with a 1:1 gluten-free baking blend.
Can I make this cake ahead of time?
Absolutely! You can bake and freeze the layers, then frost just before serving for your event.
What can I do if my cake layers are uneven?
If some layers bake unevenly, you can trim the tops with a serrated knife to make them flat before frosting.
Final Thoughts
Layer Cake Soleil & Lune is a stunning dessert that tastes as good as it looks. It’s perfect for bringing people together and celebrating special moments. Whether you’re an experienced baker or just starting out, this cake is achievable and rewarding. Give it a try and bring a slice of joy to your table!