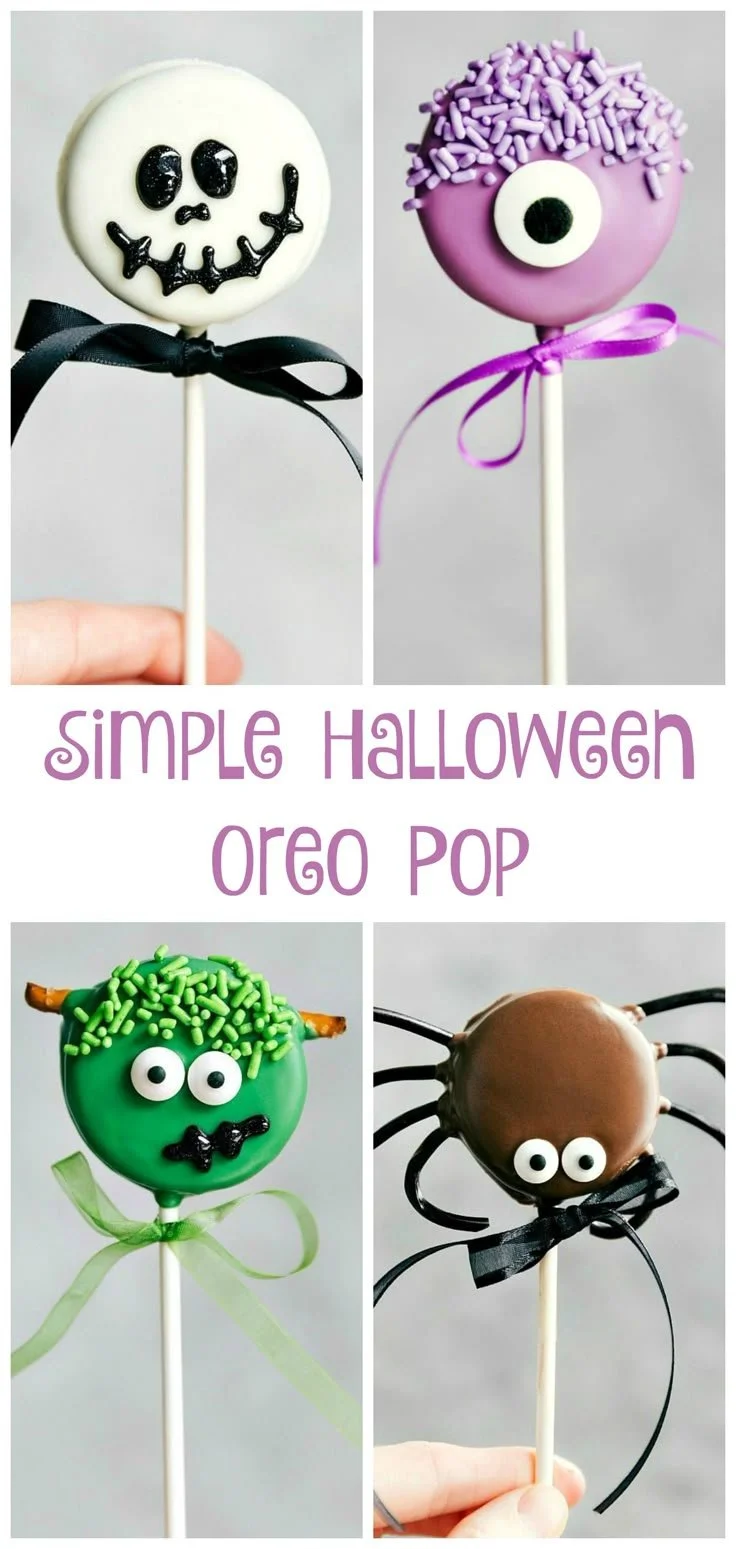
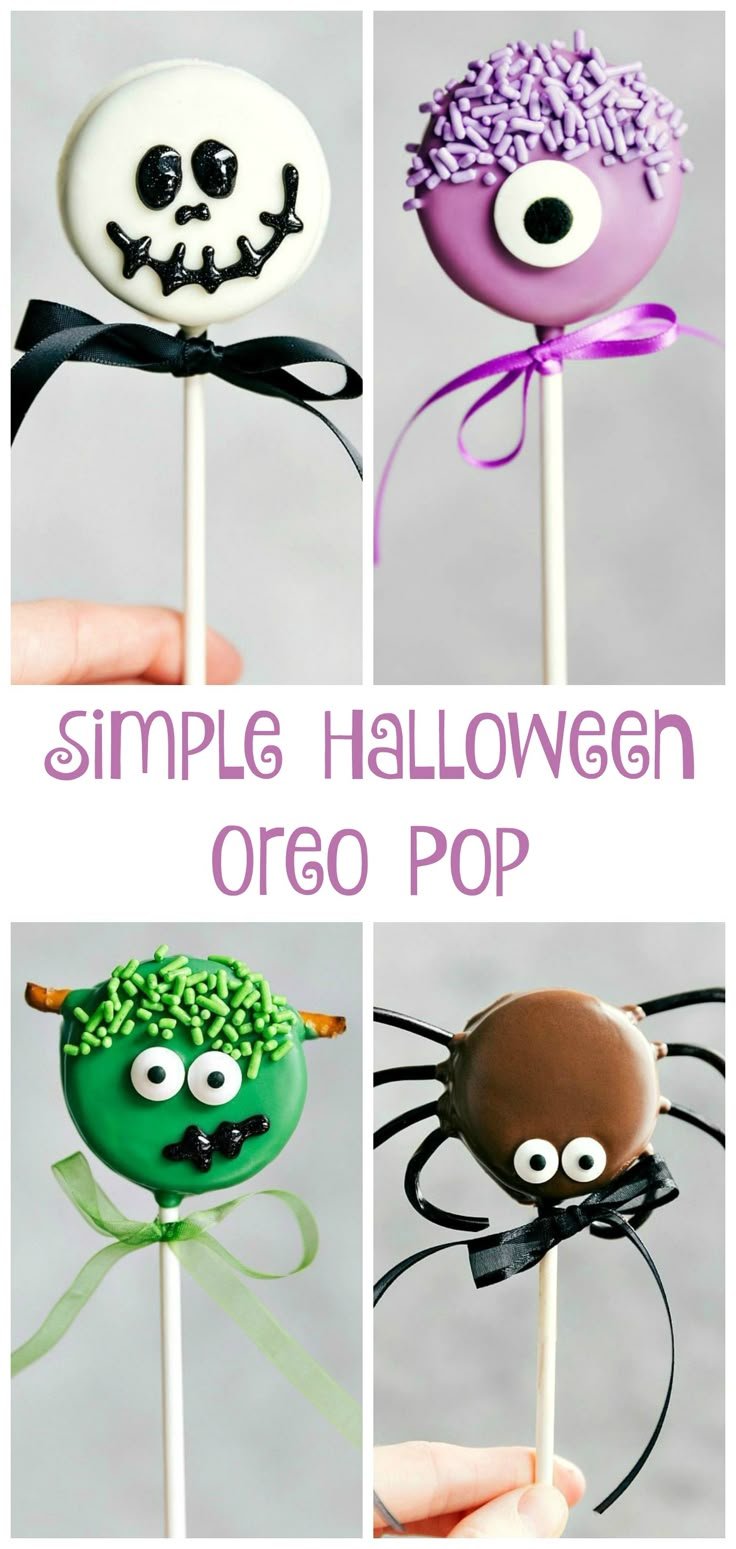
This Simple Halloween Oreo Pop recipe is a delightful and fun treat to make for the spooky season. Easy to create and decorated to look like spiders, skeletons, Frankensteins, and monsters, these Oreo Pops are perfect for parties, school events, or just a family activity. With minimal ingredients and effort, you can impress your little ghosts and goblins with these creative snacks.
Why You’ll Love Simple Halloween Oreo Pops
- Fun and Festive: Each Oreo Pop can be decorated to represent classic Halloween characters, making them visually appealing and exciting for kids and adults alike.
- No Baking Required: This recipe is perfect for beginners, as it requires no cooking – just dipping and decorating.
- Quick to Prepare: You can whip these up in under 30 minutes, leaving you plenty of time to enjoy the festivities.
- Customizable: With a variety of toppings and decoration styles, you can easily personalize these pops for any Halloween gathering.
- Kid-Friendly Fun: Get your little ones involved in the decorating process for a fun family activity that sparks creativity.
Recipe Overview
- Prep Time: 15 minutes
- Cook Time: 0 minutes
- Total Time: 30 minutes (including cooling time)
- Servings: 12 Oreo Pops
- Difficulty Level: Easy
Ingredients You’ll Need for Simple Halloween Oreo Pops
- Oreo Cookies (12): Classic or any flavored Oreos work great. For a different taste, try using golden Oreos.
- Candy Melts (1 bag): Choose black, orange, or green for a festive touch. You can also mix colors for a swirled effect.
- Lollipop Sticks (12): These are essential for turning your Oreos into pops. Buy sturdy sticks for best results.
- Decorating Items:
- Edible eyes (for spiders and monsters)
- Colored sprinkles or mini chocolate chips (for skeletons and Frankensteins)
- Melting chocolates or icing (for detail work)
How to Make Simple Halloween Oreo Pops
-
Melt the Candy Melts
In a microwave-safe bowl, add your candy melts. Microwave in 30-second intervals, stirring after each until completely melted and smooth. -
Prepare the Oreos
Take each Oreo and dip one end into the melted candy. Allow any excess candy to drip off. -
Insert the Stick
Immediately after dipping, insert a lollipop stick into the cream filling of the Oreo. Place it upright in a piece of Styrofoam or an empty egg carton to hold it and allow cooling. -
Let Them Set
Place the dipped Oreos in the fridge for about 10-15 minutes to set the candy coating. -
Decorate
Once the candy coating has hardened, use additional candy melts or icing to add features. Attach edible eyes, sprinkle toppings generously, or drizzle contrasting colors for decoration. -
Display and Enjoy
Once you’re done decorating, let the pops set again for a few minutes. Serve them on a festive platter, and watch everyone enjoy!
Tips for Success
- Use Good Quality Chocolate: Ensure your candy melts are of high quality for the best melting and flavor.
- Don’t Rush the Cooling Process: Let the candy melts set completely to prevent decorations from sliding off.
- Experiment with Toppings: Get creative with sprinkles, sugar eyes, or themed candies for unique designs.
- Spread the Melting Process: If the melts begin to thicken too quickly, place the bowl back in the microwave for a few seconds to re-melt.
- Plan Your Design: Before decorating, visualize or sketch your design to streamline the decorating process.
Easy Variations
- Halloween Monsters: Use different colored candy melts and add fun monster features like gummy worms or candy horns.
- Pumpkin Pops: Dip Oreos in orange candy melts and add green icing as stems for cute pumpkin pops.
- Ghost Pops: Dip in white melting chocolate, then use black icing to pipe on ghostly eyes and mouths.
- Black Cat Pops: Use black candy melts and add ears made of chocolate pieces, attaching with melted chocolate.
- Spider Pops: Create spider legs using chocolate twizzlers or pipe chocolate for the legs.
What to Serve with Simple Halloween Oreo Pops
- Spooky Punch: A bright, fruity punch with floating fruit slices complements the festive feel.
- Mini Cupcakes: Halloween-themed cupcakes can tie into the dessert table’s spooky theme.
- Candy Corn: A classic Halloween treat that adds color and complements the themes of the pops.
- Popcorn Bar: Offer flavored popcorns for munching between Oreo pops, filling the table with textures.
- Fruits and Veggie Platters: Balance the sweetness of the pops with some healthy options, like cut fruit shaped into Halloween characters.
Storage and Reheating
- Refrigerator Storage: Keep Oreo Pops in an airtight container in the fridge for up to a week.
- Freezer Storage: You can freeze them individually wrapped for up to a month, allowing for defrosting as needed.
- Best Reheating Method: Oreo Pops do not require reheating and are best served cold.
- Preserving Texture: To avoid any melting or loss in decor, ensure they are well-wrapped if freezing.
Common Mistakes to Avoid
- Not Allowing Pops to Set: Skipping the cooling step can lead to decorations that slide off or fall apart.
- Using Warm Candy Melts: Make sure your melts cool slightly before dipping the Oreos; otherwise, they can be too soft.
- Not Planning Your Decorations: It’s easy to feel overwhelmed; having a plan will help keep your decorating process organized and fun.
- Overcrowding the Decorating Space: Keep your workspace clear to easily reach all your decorating items without hassle.
- Using Too Much Coating: Dip lightly to avoid a heavy coat that might cover the Oreo design.
Simple Halloween Oreo Pops: Background & Cultural Inspiration
These adorable treats take on the classic Oreo cookie, which has been beloved since its creation in 1912. Inspired by fun little tricks and treats exchanged during Halloween, decorated Oreo Pops have become a popular way to add a personal touch to festive celebrations. This recipe draws inspiration from various Halloween characters, ensuring they stand out at any gathering, appealing to children and adults keen on a sweet and fun experience.
Frequently Asked Questions
Can I use any other types of cookies?
Yes! While Oreos are traditional, you can use any cookies you enjoy—just be mindful of the texture and thickness for decorating.
How do I make these gluten-free?
Use gluten-free Oreo varieties or similar cookies to make these pops gluten-free.
What if I can’t find lollipop sticks?
You can replace lollipop sticks with pretzel rods, pieces of candy canes, or even plastic straws.
Can I prepare these ahead of time?
Absolutely! These pops can be made a day or two in advance and stored in the refrigerator until you’re ready to serve.
How can I make these dairy-free?
Check that your candy melts are dairy-free. Dairy-free Oreo varieties are also available, making this a fun treat for those avoiding dairy.
Final Thoughts
Simple Halloween Oreo Pops are a perfect way to celebrate the spooky season with creativity and fun! They are easy to prepare, require no baking, and are a hit at any gathering. These treats will bring smiles and delight, making them truly worth trying this Halloween. Get your family involved and enjoy a delightful activity this fall!
PrintSimple Halloween Oreo Pops
A fun and easy treat for Halloween, these Oreo Pops are decorated to look like spooky characters, perfect for parties and family activities.
- Prep Time: 15 minutes
- Cook Time: 0 minutes
- Total Time: 30 minutes
- Yield: 12 Oreo Pops
- Category: Dessert
- Method: No-Bake
- Cuisine: American
- Diet: Vegetarian
Ingredients
- 12 Oreo Cookies
- 1 bag Candy Melts (black, orange, or green)
- 12 Lollipop Sticks
- Edible eyes (for spiders and monsters)
- Colored sprinkles or mini chocolate chips (for skeletons and Frankensteins)
- Melting chocolates or icing (for detail work)
Instructions
- Melt the Candy Melts in a microwave-safe bowl, stirring every 30 seconds until smooth.
- Prepare the Oreos by dipping one end into the melted candy, allowing excess to drip off.
- Insert the lollipop stick into the cream filling of the dipped Oreo and place it upright to cool.
- Let them set in the fridge for 10-15 minutes until the coating hardens.
- Decorate the cooled pops with additional candy melts, sprinkles, or edible eyes.
- Display and enjoy on a festive platter.
Notes
Experiment with toppings and designs for unique pops. Allow the candy melts to cool slightly before dipping.












