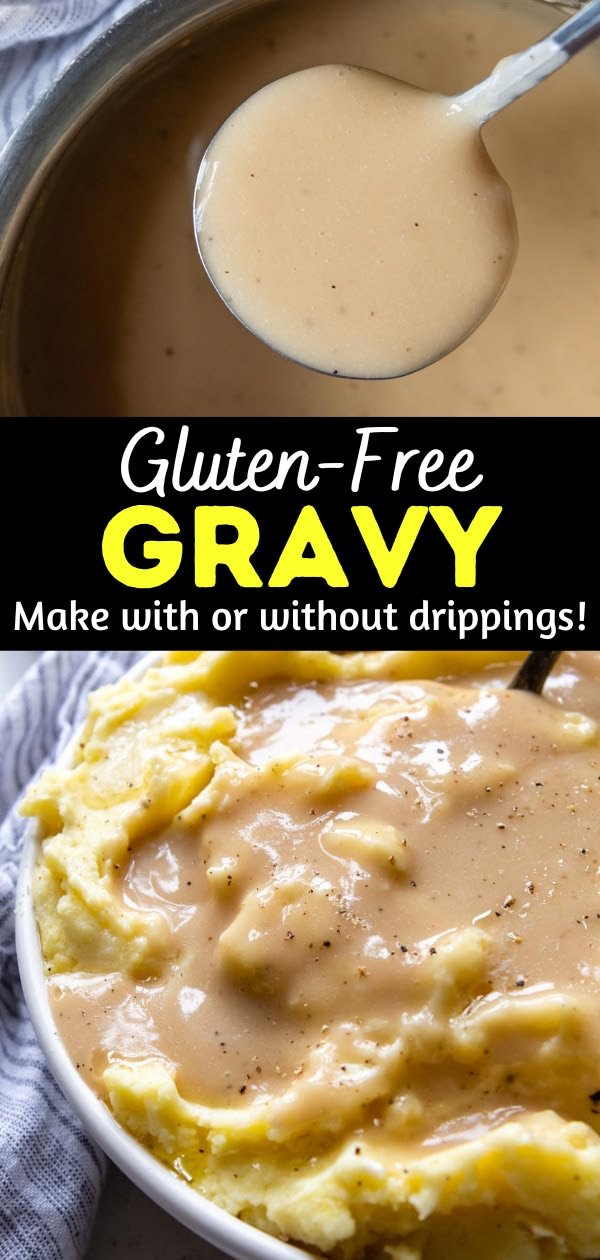
Making gluten-free gravy at home is easier than you might think! This rich and flavorful gluten-free gravy is a perfect accompaniment for mashed potatoes, roasted meats, or vegetable dishes. With just a few simple ingredients, you can whip up a delicious sauce that enhances any meal, making it a fantastic addition to your cooking repertoire.
Why You’ll Love Gluten-Free Gravy
- Easy to Make: This recipe features straightforward steps that beginner cooks can easily follow, ensuring that you can make gravy without any complications.
- Quick Preparation: You can prepare this gravy in under 15 minutes, making it the perfect last-minute addition to any meal.
- Customizable Flavor: With options to add your favorite herbs or drippings, you can tweak the flavor profile to suit your taste and the dish you’re serving.
- Perfect for Meal Prep: Make a big batch to store for later, enhancing your weeknight dinners or holiday meals without extra hassle.
- Comforting and Satisfying: This gravy provides a rich, homey flavor that elevates any dish, making it an essential comfort food classic.
Recipe Overview
- Prep Time: 5 minutes
- Cook Time: 10 minutes
- Total Time: 15 minutes
- Servings: 4 servings
- Difficulty Level: Easy
Ingredients You’ll Need for Gluten-Free Gravy
- Gluten-Free Flour or Cornstarch: This acts as the thickener for your gravy. Use gluten-free all-purpose flour or cornstarch depending on your preference.
- Drippings (optional): If you’re making gravy for roasted meats, drippings add depth of flavor. If not using, simply skip this step.
- Broth or Water: Chicken, beef, or vegetable broth enhances the flavor, while water can be used for a lighter version.
- Salt: Essential for seasoning; adjust to taste.
- Pepper: Freshly ground black pepper adds a bit of heat; you can adjust this based on your preference.
- Herbs (optional): Fresh or dried herbs like thyme or sage can be added to introduce extra flavor.
How to Make Gluten-Free Gravy
- Prepare the Base: In a saucepan, combine the gluten-free flour or cornstarch with the drippings if you’re using them. Whisk until smooth to create a paste.
- Add Liquid: Gradually add the broth or water while whisking constantly to prevent lumps from forming.
- Heat the Mixture: Cook over medium heat, stirring continuously, until the gravy thickens to your desired consistency. This usually takes about 5-7 minutes.
- Season to Taste: Once thickened, add salt, pepper, and any optional herbs to enhance the flavor.
- Serve Warm: Pour the gravy over your favorite dishes and enjoy immediately for the best taste.
Tips for Success
- Whisk Constantly: To prevent lumps, keep whisking the mixture as you add liquid and while it cooks.
- Control the Thickness: If you prefer a thicker gravy, use more gluten-free flour or cornstarch; for a thinner gravy, add more liquid.
- Taste as You Go: Seasoning can vary with different broths, so taste the gravy before serving, adjusting salt and pepper as needed.
- Monitor the Heat: Don’t rush the cooking process; keep the heat moderate to avoid scorching the gravy.
- Clean Equipment: Make sure to keep all your cooking tools dry and clean to prevent clumping in your gravy.
Easy Variations
- Herb-Infused Gravy: Add fresh rosemary, thyme, or sage while cooking to infuse the gravy with aromatic flavors.
- Cheesy Gravy: Stir in some shredded cheese at the end for a creamy, cheesy twist. This is great for serving over biscuits.
- Mushroom Gravy: Sauté some mushrooms in the pan before adding the flour for a rich, earthy variation.
- Spicy Gravy: Add a pinch of cayenne pepper or red pepper flakes for a kick of heat.
- Vegetable Gravy: Incorporate sautéed onions and garlic for added depth and flavor.
What to Serve with Gluten-Free Gravy
- Mashed Potatoes: This classic pairing is a must; the gravy enhances the creamy potatoes beautifully.
- Roasted Chicken or Turkey: Elevates the flavor of roasted meats with delicious savory notes.
- Vegetable Dishes: Drizzle over steamed vegetables like green beans or carrots for added taste and satisfaction.
- Biscuits: Perfect for a hearty breakfast or brunch, topped with gravy for comfort.
- Turkey Meatloaf: A generous pour of gravy can turn an ordinary meatloaf into a delightful meal.
Storage and Reheating
- Refrigerator Storage: Store any leftover gravy in an airtight container in the fridge for up to 3 days.
- Freezer Storage: You can freeze gravy for up to 2 months. Freeze in portions for easy thawing and use later.
- Best Reheating Method: Reheat in a saucepan over low heat, adding a splash of water or broth if it’s too thick. Stir continuously until heated through.
- Preserve Texture: To maintain a smooth texture, avoid reheating in the microwave as this can change the consistency.
- Meal Prep Note: Make a double batch to have plenty of gravy on hand for future meals.
Common Mistakes to Avoid
- Not Whisking Enough: Failing to whisk properly while adding liquid can lead to lumps, making the gravy less appealing.
- Cooking on High Heat: Cooking too fast can scorch the flour, resulting in a burnt taste. Keep the heat moderated.
- Skipping Taste Testing: Skipping the seasoning step can leave your gravy bland. Always taste before serving.
- Over-Thickening: Adding too much flour or cornstarch will create an overly thick gravy. Start with less, and add more as needed.
- Using Cold Liquid: Always add room temperature or warmed broth/water to prevent clumping.
Gluten-Free Gravy: Background & Cultural Inspiration
Gravy is a staple in many cuisines around the world, often reserved for special occasions and family gatherings. In the United States, it’s commonly served alongside classic comfort foods during Thanksgiving and Sunday dinners. Making a gluten-free version allows those with dietary restrictions to enjoy this beloved dish without compromising flavor or tradition. This recipe embraces the home-cooked essence of gravy while ensuring everyone can partake in its warmth and richness.
Frequently Asked Questions
Can I use cornstarch instead of gluten-free flour?
Absolutely! Cornstarch is an excellent thickening agent and works perfectly in this recipe. Just mix it with cold liquid first before adding it to the hot mixture.
How can I make the gravy dairy-free?
Simply omit any buttery drippings and use a dairy-free broth. You can also add a touch of olive oil or coconut oil for richness.
Can I make this gravy ahead of time?
Yes! You can prepare the gravy ahead, store it in the refrigerator, and reheat it when you’re ready to serve.
What’s the best way to thicken gravy?
If your gravy is too thin, mix a small amount of gluten-free flour or cornstarch with cold water to make a slurry, then slowly whisk it into the gravy while it simmers.
Is there a vegetarian version of this gravy?
Yes! Use vegetable broth instead of meat broth to create a delicious vegetarian gravy that’s wholesome and full of flavor.
Final Thoughts
This gluten-free gravy is not only simple to make but also a versatile addition to your meal rotation. With its comforting flavor and quick preparation time, it’s undoubtedly worth trying for any gathering or weeknight dinner. Whether you serve it over mashed potatoes or drizzle it over roasted vegetables, this gravy is sure to become a favorite in your kitchen. Enjoy the process of making it and the delicious results!
PrintGluten-Free Gravy

An easy, rich, and flavorful gluten-free gravy perfect for mashed potatoes and roasted meats.
- Prep Time: 5 minutes
- Cook Time: 10 minutes
- Total Time: 15 minutes
- Yield: 4 servings
- Category: Sauce
- Method: Stovetop
- Cuisine: American
- Diet: Gluten-Free
Ingredients
- 1/4 cup gluten-free flour or cornstarch
- 1/2 cup drippings (optional)
- 2 cups broth or water
- Salt to taste
- Freshly ground black pepper to taste
- Herbs (optional, such as thyme or sage)
Instructions
- Prepare the base: In a saucepan, combine the gluten-free flour or cornstarch with the drippings if you’re using them. Whisk until smooth to create a paste.
- Add liquid: Gradually add the broth or water while whisking constantly to prevent lumps from forming.
- Heat the mixture: Cook over medium heat, stirring continuously, until the gravy thickens to your desired consistency, about 5-7 minutes.
- Season to taste: Once thickened, add salt, pepper, and any optional herbs to enhance the flavor.
- Serve warm: Pour the gravy over your favorite dishes and enjoy immediately.
Notes
Whisk constantly to prevent lumps. Control thickness by adjusting flour or liquid amounts.