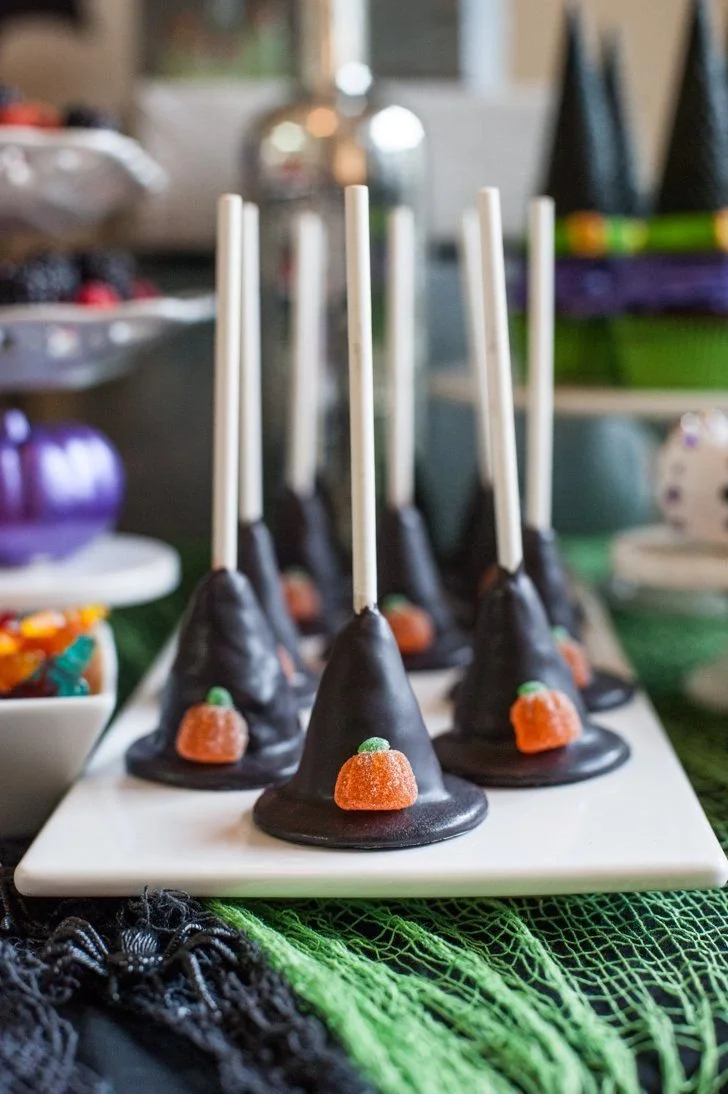
When it comes to Halloween treats, Cake Pop Witch Hats are an absolute delight. Combining the fun of cake pops with a spooky twist, these treats are perfect for parties, school events, or a festive family activity. Easy to make and wonderfully colorful, they bring a touch of magic to your Halloween celebrations.
Why You’ll Love Cake Pop Witch Hats
- Fun and Festive: These cake pops add a playful and whimsical touch to your Halloween festivities, making them a hit with both kids and adults.
- Easy to Make: With simple steps that require no baking skills, even beginner cooks can create these delightful treats without stress.
- Customizable: You can personalize your witch hats with different sprinkles or icing to fit your style or theme, making them uniquely yours.
- Perfect for Sharing: These cake pops are easy to transport and serve at gatherings, allowing you to spread the Halloween cheer wherever you go.
- Satisfying and Delicious: The combination of moist cake and rich chocolate creates an indulgent treat that’s sure to please your taste buds.
Recipe Overview
- Prep Time: 20 minutes
- Cook Time: 30 minutes
- Total Time: 50 minutes
- Servings: 12 cake pops
- Difficulty Level: Easy
Ingredients You’ll Need for Cake Pop Witch Hats
-
For the Cake Pops:
- 1 box cake mix (flavor of your choice)
- 2 eggs (for binding)
- 1/3 cup vegetable oil (for moisture)
- 1 cup water (for mixing)
-
For the Decoration:
- 1 bag chocolate melting wafers (for coating)
- 12 sugar cones (to create the witch hats)
- Black icing (for decorating)
- Sprinkles (for added flair)
- 12 lollipop sticks (to hold the cake pops)
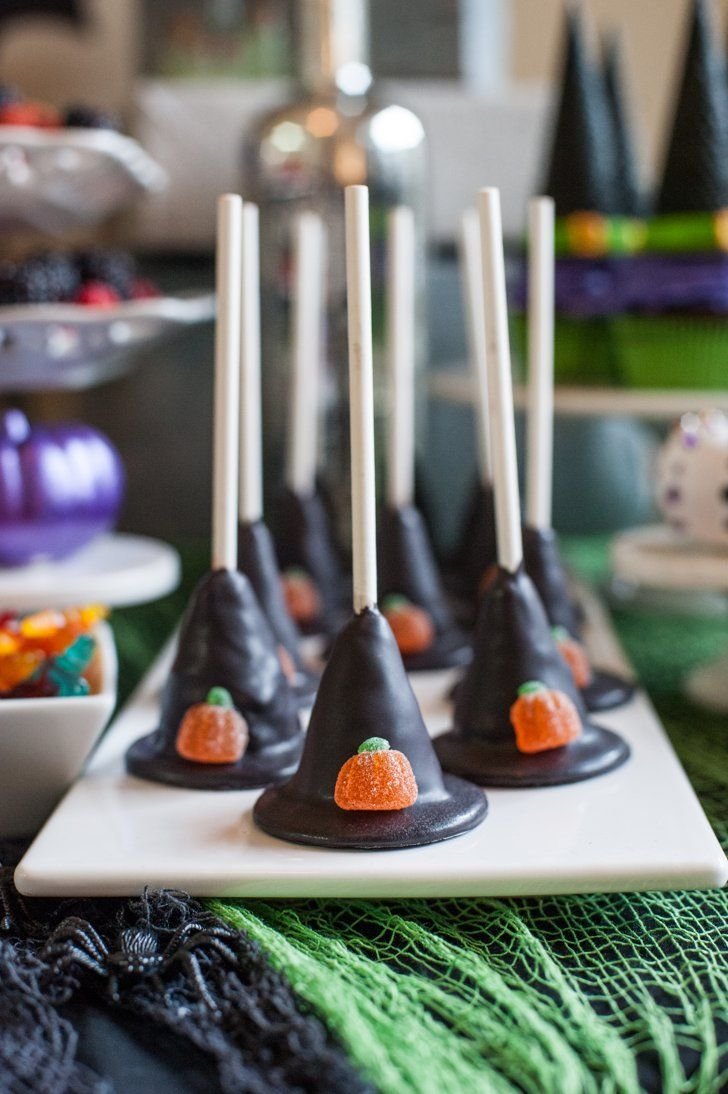
How to Make Cake Pop Witch Hats
- Bake the Cake: Prepare the cake according to the package instructions. Once baked, allow it to cool completely on a wire rack.
- Crumble the Cake: Once cooled, crumble the cake into a large bowl using your hands until it resembles fine crumbs.
- Mix with Frosting: Add your favorite frosting to the crumbled cake. Mix well until fully combined and the mixture holds together.
- Shape the Cake Pops: Form the mixture into balls about 1 inch in diameter. Carefully insert a lollipop stick into each ball, ensuring it goes in about halfway.
- Freeze the Cake Pops: Place the cake pops in the freezer for about 30 minutes to help them firm up.
- Melt the Chocolate: While the pops are freezing, melt the chocolate melting wafers according to the package directions until smooth.
- Dip the Cake Pops: Remove the pops from the freezer and dip each one into the melted chocolate, ensuring they are fully coated.
- Add the Hat: Quickly place a sugar cone on top of each pop to create the witch hat before the chocolate sets.
- Decorate: Use black icing to create decorations on the hats. Sprinkle with your choice of sprinkles for added Halloween flair.
- Set and Enjoy: Allow the chocolate to set completely before enjoying your spooky treats!
Tips for Success
- Cooling Time: Make sure your cake is completely cool before crumbling; otherwise, the mixture can become too hot and difficult to handle.
- Proper Mixing: Mix the frosting in thoroughly; this helps the cake pops hold their shape better.
- Chocolate Consistency: Ensure the chocolate is not too thick when dipping; if needed, add a little vegetable oil to thin it out.
- Get Creative with Toppings: Think about using colored icing or themed sprinkles for different occasions if you’re not just sticking with Halloween.
- Storing Your Cake Pops: Keep the pops in a cool place during warm weather to prevent melting.
Easy Variations
- Flavor Swaps: Use a different cake flavor, such as red velvet or carrot cake, to create unique taste profiles.
- Chocolate Variety: Try using white chocolate or a flavored chocolate coating for a different look and taste.
- Dairy-Free Option: Use dairy-free chocolate and frosting for a vegan-friendly version of these treats.
- Add a Filling: Insert a piece of candy or a chocolate nugget inside each cake ball for a surprise center.
- Mini Witch Hats: Create smaller versions by making mini cake balls and cutting sugar cones to fit.
What to Serve with Cake Pop Witch Hats
- Spider Web Cupcakes: These add a complementary spooky theme to your dessert table.
- Witch’s Brew Punch: A refreshing drink that kids will love, fitting right into the Halloween mood.
- Candy Corn Parfaits: Layered desserts that are colorful and festive, appealing to the eye as well as the palate.
- Savory Mummy Dogs: A fun balance of sweet and savory, perfect for creating a well-rounded Halloween feast.
- Ghostly Fruit Skewers: These provide a lighter, healthier option to the decadent treats.
Storage and Reheating
- Refrigerator Storage: Keep any uneaten cake pops in an airtight container in the fridge for up to a week.
- Freezer Storage: You can freeze the cake pops before decorating them. They will last for up to a month. Wrap them individually in plastic wrap and place them in an airtight container.
- Reheating Method: Allow frozen cake pops to thaw in the fridge overnight and then decorate as desired.
- Texture Preservation: To maintain the cake pops’ softness, try not to freeze them after they are fully covered in chocolate, as it may alter the texture.
Common Mistakes to Avoid
- Not Allowing the Cake to Cool: Skipping the cooling step can lead to cake pops that crumble or fall apart.
- Overmixing the Frosting: Mixing too hard can create a runny mixture that won’t hold its shape; aim for a good blend without overdoing it.
- Skipping the Freezing Step: Not chilling the cake pops can result in them losing shape while being dipped in chocolate.
- Using Cold Chocolate: Make sure the melted chocolate is warm but not too hot; this helps in proper coating without cracking.
- Not Testing the Dip: Test your chocolate’s consistency before fully dipping; it should be pourable but thick enough to coat well.
Cake Pop Witch Hats: Background & Cultural Inspiration
Cake pops, with their roots traced back to the early 2000s, have become a popular treat in the realm of desserts, particularly due to their fun shapes and versatility. Halloween brings about a plethora of creative options for these treats, incorporating flavors, colors, and decorations associated with the spooky season. The witch hat design not only resonates with the holiday but symbolizes creativity and playfulness in cooking, allowing both adults and children to participate in the festive spirit. Using simple ingredients and easy methods, these cake pop witch hats exemplify how cooking can be a joyous activity shared among family and friends, enhancing celebrations with delightful treats.
Frequently Asked Questions
How do I store leftover cake pops?
Store leftover cake pops in an airtight container in the refrigerator for up to a week, or freeze them for up to a month. Be sure to wrap them individually if freezing.
Can I use a different type of cake mix?
Yes, you can substitute any flavor of cake mix to suit your taste preferences. Just ensure it’s a standard size pack.
How can I make these gluten-free?
To make gluten-free cake pop witch hats, use a gluten-free cake mix and check that all other ingredients, like sprinkles and chocolate wafers, are also gluten-free.
What should I do if my chocolate is too thick?
If your melted chocolate is too thick, consider stirring in a small amount of vegetable oil or shortening gradually until you achieve a smooth, pourable consistency.
Can I make these ahead of time?
Absolutely! You can prepare the cake pops and freeze them without the chocolate coating. When ready to serve, just melt the chocolate and dip them before decorating.
Final Thoughts
Cake Pop Witch Hats are a charming and enjoyable Halloween treat that anyone can make, bringing together fun, flavor, and festivity. They not only look spectacular on any Halloween spread but are also a delight to eat. Whether you’re hosting a Halloween party or looking for a fun cooking project with the kids, these cake pops are sure to impress. Grab your ingredients and get ready to create some spooky magic in your kitchen!
PrintCake Pop Witch Hats
Fun and festive cake pop witch hats are perfect for Halloween parties and celebrations.
- Prep Time: 20 minutes
- Cook Time: 30 minutes
- Total Time: 50 minutes
- Yield: 12 cake pops
- Category: Dessert
- Method: Baking
- Cuisine: American
- Diet: Vegetarian
Ingredients
- 1 box cake mix (flavor of your choice)
- 2 eggs (for binding)
- 1/3 cup vegetable oil (for moisture)
- 1 cup water (for mixing)
- 1 bag chocolate melting wafers (for coating)
- 12 sugar cones (to create the witch hats)
- Black icing (for decorating)
- Sprinkles (for added flair)
- 12 lollipop sticks (to hold the cake pops)
Instructions
- Prepare the cake according to the package instructions. Once baked, allow it to cool completely on a wire rack.
- Crumble the cake into a large bowl using your hands until it resembles fine crumbs.
- Add your favorite frosting to the crumbled cake. Mix well until fully combined and the mixture holds together.
- Form the mixture into balls about 1 inch in diameter. Carefully insert a lollipop stick into each ball, ensuring it goes in about halfway.
- Place the cake pops in the freezer for about 30 minutes to help them firm up.
- Melt the chocolate melting wafers according to the package directions until smooth.
- Remove the pops from the freezer and dip each one into the melted chocolate, ensuring they are fully coated.
- Quickly place a sugar cone on top of each pop to create the witch hat before the chocolate sets.
- Use black icing to create decorations on the hats. Sprinkle with your choice of sprinkles for added Halloween flair.
- Allow the chocolate to set completely before enjoying your spooky treats!
Notes
Make sure your cake is completely cool before crumbling to avoid difficulty handling the mixture.












