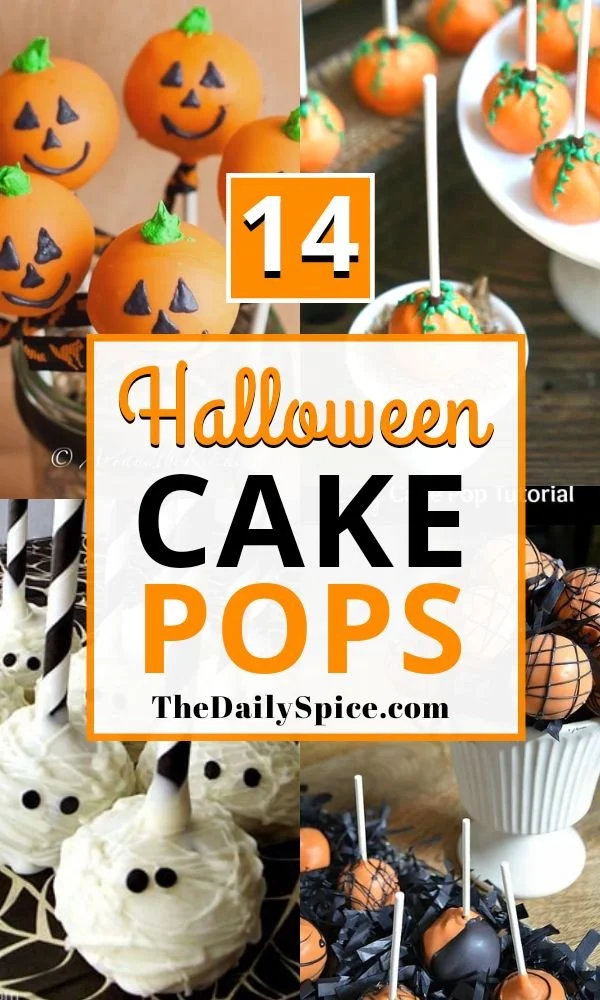
Making Halloween cake pops is a delightful way to celebrate the spooky season! These fun, bite-sized treats combine your favorite cake flavors with a splash of creativity, making them perfect for parties or family gatherings. Plus, they are easy to make, allowing both novice bakers and seasoned pros to get in on the fun.
Why You’ll Love Halloween Cake Pops
- Fun and Festive: These cake pops are perfect for Halloween, offering a whimsical way to satisfy your sweet tooth while adding a decorative touch to your festivities.
- Customizable: With various flavors of cake mix and frosting available, you can tailor these treats to your taste or dietary preferences, ensuring everyone can enjoy them.
- Easy to Make: Even if you’re new to baking, the straightforward steps make crafting these cake pops a breeze, allowing you to create a crowd-pleaser without stress.
- Great for Kids: Get the whole family involved! Kids love rolling the cake balls and decorating them, making this a perfect bonding activity.
- Portable Treats: Cake pops are easy to transport, making them ideal for parties, school events, or as unique lunchbox surprises.
Recipe Overview
- Prep time: 20 minutes
- Cook time: 30 minutes
- Total time: 50 minutes (plus chilling time)
- Servings: 24 cake pops
- Difficulty level: Easy
Ingredients You’ll Need for Halloween Cake Pops
- 1 box cake mix (any flavor)
- 1 cup frosting (any flavor)
- Candy melts (various colors)
- Lollipop sticks
- Sprinkles (optional)
- Chocolate chips or edible eyes (for decoration)
When selecting your ingredients, choose flavors that you enjoy. The combination of cake and frosting is critical for achieving the right texture—aim for a moist cake mix that works well with your chosen frosting. Feel free to experiment with seasonal colors of candy melts for a spooky touch!
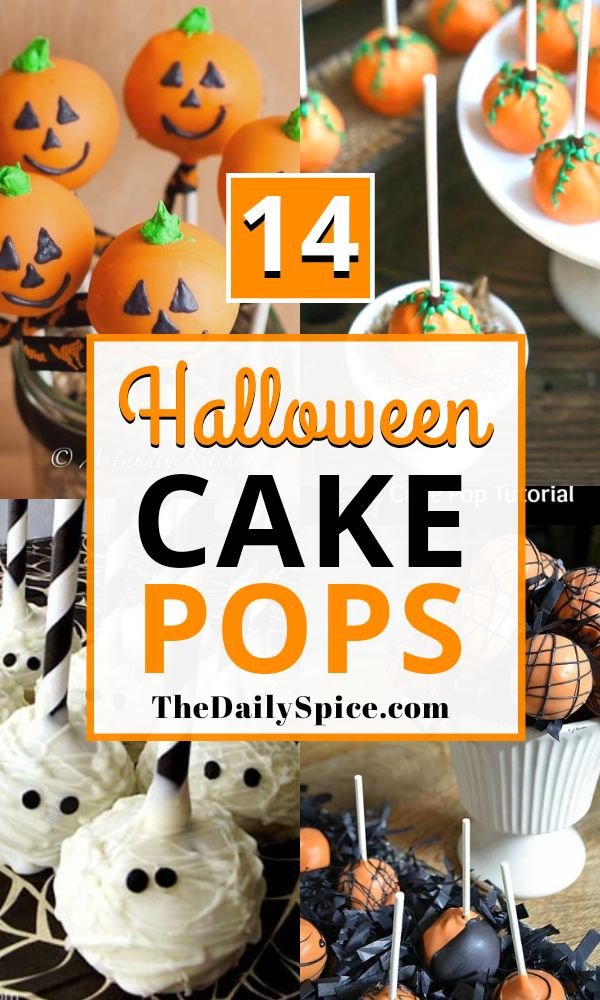
How to Make Halloween Cake Pops
-
Bake the Cake
Prepare the cake mix according to the package instructions, then bake it in a greased pan. Ensure it’s completely cooled before moving on to the next step for a successful pop. -
Crumble the Cake
Once cooled, crumble the cake into a large mixing bowl. Aim for a fine crumb to ensure even mixing with the frosting. -
Mix in the Frosting
Add the frosting to the crumbled cake. Mix until fully combined and the mixture holds together; it should be slightly sticky but manageable. -
Roll Into Balls
Use your hands to roll the mixture into small balls about 1 inch in diameter. Place these on a lined baking sheet. -
Chill the Cake Balls
Insert lollipop sticks into each ball and place the baking sheet in the freezer for about 30 minutes. This step helps firm them up for easier dipping. -
Melt the Candy Melts
In a microwave-safe bowl, melt the candy melts according to the package instructions, stirring until smooth. Ensure there are no lumps; smooth candy is key to a beautiful finish. -
Dip the Cake Pops
Remove the cake balls from the freezer. Dip each pop into the melted candy melts, allowing any excess coating to drip back into the bowl. -
Decorate
While the candy melt coating is still wet, sprinkle with sprinkles or place chocolate chips or edible eyes for decoration. Be creative, as this is the fun part! -
Set the Cake Pops
Place the decorated pops upright in a foam block or a cupcake holder to allow them to set. Let the pops cool completely before serving. -
Serve and Enjoy
Once they’re hardened, your Halloween cake pops are ready to delight friends and family!
Tips for Success
- Proper Cooling: Ensure your cake is completely cool before crumbling; this prevents moisture from seeping into your pops.
- Stick Stability: For better stick adherence, you can dip the end of each lollipop stick into the melted candy melts before inserting it into the cake ball.
- Consistent Size: Use a small ice cream scoop to ensure your cake balls are uniform in size, leading to even baking and easier handling.
- Adjust Melt Temperature: Be careful not to overheat the candy melts, as this can cause them to thicken. Heat in short intervals, stirring frequently.
- Practice Patience: Allow enough time for your cake pops to chill properly, as this makes dipping and decorating much more manageable.
Easy Variations
- Flavor Swap: Change up the cake mix and frosting flavors, such as using chocolate cake mix with vanilla frosting or spice cake with cream cheese frosting for a seasonal twist.
- Colorful Melts: Use a variety of colors for the candy melts to match your decorations or party theme, rather than sticking to basic colors.
- Coating Alternatives: Instead of candy melts, try coating with white or dark chocolate for a different flavor profile.
- Cake Pop Sundaes: Serve crumbled cake pops on a bowl of ice cream with chocolate syrup for a fun dessert.
- Vegan Option: Use a vegan cake mix and dairy-free frosting for a plant-based treat!
What to Serve with Halloween Cake Pops
- Hot Chocolate: Pair these sweet treats with a warm cup of hot chocolate for a cozy fall vibe.
- Spiced Cider: Serve with apple cider for a drink that enhances the fall flavors.
- Halloween Cookies: Add an assortment of themed cookies for a festive dessert table.
- Fruit Skewers: Balance the sweetness with some fresh fruit skewers which add color and a refreshing crunch.
- Party Mix: A crunchy party mix is a great contrast to the soft texture of cake pops, adding variety to your snack options.
Storage and Reheating
- Refrigerator Storage: Store any leftover cake pops in an airtight container in the refrigerator for up to a week.
- Freezer Storage: For longer storage, you can freeze uncoated cake balls for up to 3 months. Just remember to coat them after thawing.
- Best Reheating Method: Avoid reheating cake pops, as they are best enjoyed cold or at room temperature. If they become soft in the refrigerator, let them sit out for a few minutes before serving to regain their firmness.
- Meal Prep Note: These are perfect for meal prep. Make a large batch in advance and store them for easy snacking throughout the week.
Common Mistakes to Avoid
- Skipping the Chilling Step: Do not skip freezing the cake balls; this step is critical for stability when dipping.
- Overbaking the Cake: Follow the package instructions closely, as overbaking can dry out your cake and make it challenging to combine with frosting.
- Improper Candy Melts Consistency: Ensure the candy melts are smooth; lumps can wreck the coating.
- Too Much Frosting: Adding too much frosting can make the mixture overly wet; add it gradually until you achieve the right consistency.
- Ignoring Cleanliness: Be sure to wash your hands and utensils well between steps to maintain a clean workspace and avoid cross-contamination.
Halloween Cake Pops: Background & Cultural Inspiration
Halloween treats have a rich history, often inspired by ancient traditions celebrating the harvest season and honoring the dead. Cake pops, in particular, are a modern invention that combines beloved cake flavors into a portable, fun snack. They gained popularity as part of the cupcake craze in the early 2000s, making their way into bakeries and homes due to their adaptability and appealing presentation. Today, cake pops are a staple at celebrations, especially seasonal festivities like Halloween, where creative decorating can make them a part of the spooky theme.
Frequently Asked Questions
Can I use any cake mix for cake pops?
Yes! Any flavor of cake mix works; just adjust the frosting to match for a balanced taste.
How should I store leftover cake pops?
Store them in an airtight container in the refrigerator for up to a week, or freeze the uncoated cake balls for longer storage.
Can I make these cake pops ahead of time?
Absolutely! You can make cake pops up to a few days in advance. Just store them properly in the fridge.
Do I need special equipment to make cake pops?
Basic kitchen tools like mixing bowls, a baking sheet, and lollipop sticks are all you need; a foam block is optional for setting pops.
What should I do if my cake pops fall off the stick?
This can happen if the cake balls are too warm during dipping. Ensure they are chilled properly before decorating, and use a bit of melted candy around the lollipop stick before inserting it for added adhesion.
Final Thoughts
Halloween cake pops are a fun and approachable treat that combines creativity with deliciousness. They are perfect for celebrating the spooky season and will surely make any gathering more festive. Try making them for your next party or family event—you’ll be amazed at how much joy they bring to both kids and adults alike! So gather your ingredients and get ready to create some enchanting treats!
PrintHalloween Cake Pops

Fun and festive Halloween cake pops that are easy to make and perfect for celebrations.
- Prep Time: 20 minutes
- Cook Time: 30 minutes
- Total Time: 50 minutes
- Yield: 24 cake pops
- Category: Dessert
- Method: Baking
- Cuisine: American
- Diet: Vegetarian
Ingredients
- 1 box cake mix (any flavor)
- 1 cup frosting (any flavor)
- Candy melts (various colors)
- Lollipop sticks
- Sprinkles (optional)
- Chocolate chips or edible eyes (for decoration)
Instructions
- Bake the Cake: Prepare the cake mix according to the package instructions, then bake it in a greased pan. Ensure it’s completely cooled before moving on to the next step for a successful pop.
- Crumble the Cake: Once cooled, crumble the cake into a large mixing bowl. Aim for a fine crumb to ensure even mixing with the frosting.
- Mix in the Frosting: Add the frosting to the crumbled cake. Mix until fully combined and the mixture holds together; it should be slightly sticky but manageable.
- Roll Into Balls: Use your hands to roll the mixture into small balls about 1 inch in diameter. Place these on a lined baking sheet.
- Chill the Cake Balls: Insert lollipop sticks into each ball and place the baking sheet in the freezer for about 30 minutes. This step helps firm them up for easier dipping.
- Melt the Candy Melts: In a microwave-safe bowl, melt the candy melts according to the package instructions, stirring until smooth. Ensure there are no lumps; smooth candy is key to a beautiful finish.
- Dip the Cake Pops: Remove the cake balls from the freezer. Dip each pop into the melted candy melts, allowing any excess coating to drip back into the bowl.
- Decorate: While the candy melt coating is still wet, sprinkle with sprinkles or place chocolate chips or edible eyes for decoration. Be creative, as this is the fun part!
- Set the Cake Pops: Place the decorated pops upright in a foam block or a cupcake holder to allow them to set. Let the pops cool completely before serving.
- Serve and Enjoy: Once they’re hardened, your Halloween cake pops are ready to delight friends and family!
Notes
Ensure your cake is completely cool before crumbling to prevent moisture from seeping into your pops.












