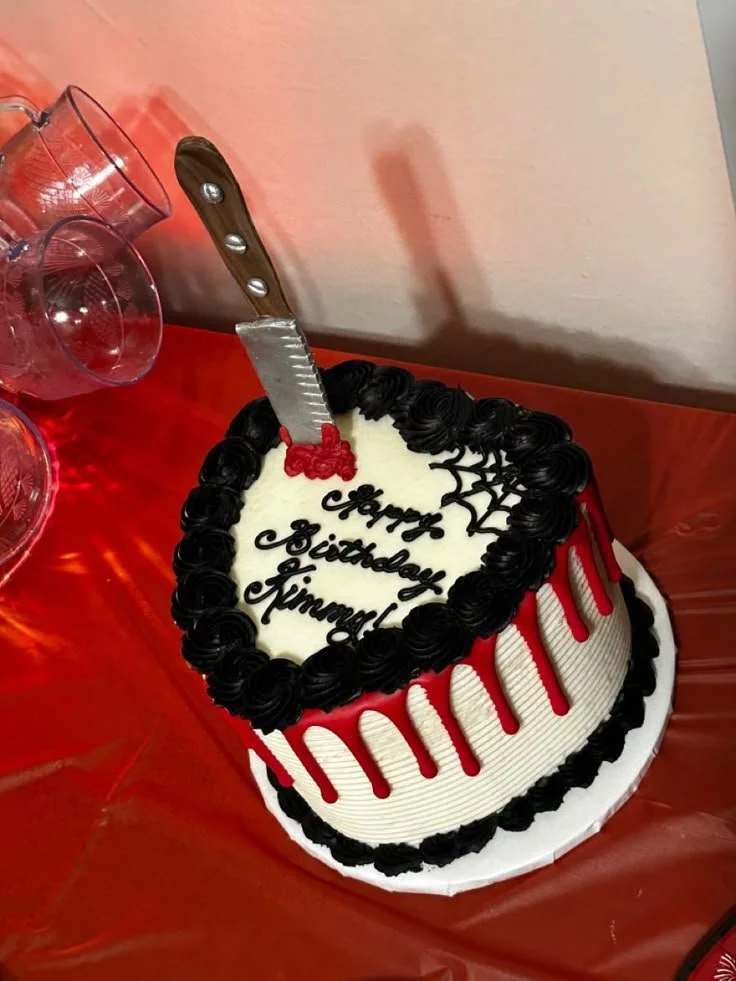
Making a Halloween Spooky Birthday Cake is a fun and festive way to celebrate your loved one’s special day. This cake not only looks impressive, but it also delivers on flavor and moist texture, making it a treat for both the eyes and taste buds. With Halloween right around the corner, this cake is sure to add an extra layer of excitement to any birthday party or fall gathering.
Why You’ll Love Halloween Spooky Birthday Cake
- Visual Appeal: This cake is a showstopper with its vibrant colors and spooky decorations, making it perfect for Halloween-themed parties.
- Easy to Make: With straightforward steps and readily available ingredients, even beginner bakers can successfully create this delightful dessert.
- Customizable: You can easily adjust the colors and decorations to fit different themes or personal preferences.
- Delicious Flavor: Made with a classic vanilla or chocolate flavor, this cake pairs wonderfully with a variety of frostings.
- Fun for All Ages: This cake isn’t just for kids—adults will enjoy its festive charm and delicious taste too!
Recipe Overview
- Prep Time: 30 minutes
- Cook Time: 30 minutes
- Total Time: 1 hour
- Servings: 12
- Difficulty Level: Easy
Ingredients You’ll Need for Halloween Spooky Birthday Cake
-
For the Cake:
- 2 cups all-purpose flour
- 1 ½ cups granulated sugar
- ½ cup unsweetened cocoa powder (if making chocolate cake)
- 1 cup unsalted butter, softened
- 4 large eggs
- 1 cup buttermilk
- 2 teaspoons vanilla extract
- 2 teaspoons baking powder
- 1 teaspoon baking soda
- ½ teaspoon salt
-
For the Frosting:
- 1 cup unsalted butter, softened
- 4 cups powdered sugar
- 2 teaspoons vanilla extract
- 2-3 tablespoons heavy cream (or milk)
- Food coloring (orange, purple, or green for decoration)
-
For Decoration:
- Candy corn
- Halloween-themed cake toppers
- Edible glitter (optional)

How to Make Halloween Spooky Birthday Cake
-
Preheat the Oven
Preheat your oven to 350°F (175°C). Prepare two 9-inch round cake pans by greasing them with butter or non-stick spray. -
Mix Dry Ingredients
In a large mixing bowl, combine the flour, cocoa powder (if using), baking powder, baking soda, and salt. Whisk well and set aside. -
Cream Butter and Sugar
In another bowl, cream the softened butter and granulated sugar together until the mixture is light and fluffy, about 3-4 minutes. -
Add Eggs and Vanilla
Add the eggs one at a time, mixing well after each addition. Stir in the vanilla extract until fully combined. -
Combine Ingredients
Gradually add the dry ingredient mixture to the butter mixture, alternating with the buttermilk. Begin and end with the dry ingredients. Mix until just combined; do not over-mix. -
Pour and Bake
Divide the batter evenly between the prepared cake pans. Bake in the preheated oven for 25-30 minutes, or until a toothpick inserted in the center comes out clean. Let cool in pans for 10 minutes, then turn out onto wire racks to cool completely. -
Make the Frosting
While the cakes are cooling, prepare the frosting by beating the softened butter in a bowl until creamy. Gradually add the powdered sugar, vanilla extract, and heavy cream, mixing until the frosting reaches a smooth and spreadable consistency. -
Assemble the Cake
Once the cakes are completely cool, place one layer on a serving platter. Spread a layer of frosting on top, then place the second layer on top. Frost the top and sides of the cake. -
Decorate
Use food coloring to tint parts of the frosting for decoration. Decorate the cake with candy corn, Halloween-themed toppers, and optional edible glitter for an extra spooky touch.
Tips for Success
- Room Temperature Ingredients: Ensure that your butter and eggs are at room temperature for easier mixing and better texture.
- Do Not Over-Mix: When combining the wet and dry ingredients, mix just until combined to avoid a dense cake.
- Check Doneness: Use a toothpick to check for doneness; if it comes out clean, the cake is ready.
- Cooling Time: Let the cakes cool completely before frosting to prevent melting the frosting.
- Versatile Frosting: Adjust the consistency of your frosting with more or less cream to suit your decorating needs.
Easy Variations
- Flavored Cakes: Substitute vanilla extract with almond, orange, or lemon extract for a different flavor profile.
- Layer the Colors: Make a rainbow cake by layering colored batters in each cake pan for a surprise inside!
- Gluten-Free Version: Use a gluten-free flour blend to make this cake gluten-free while maintaining its delicious flavor.
- Vegan Option: Swap eggs with applesauce or flaxseed meal and use dairy-free butter and milk to make a vegan version.
What to Serve with Halloween Spooky Birthday Cake
- Ice Cream: Pair the cake with vanilla or pumpkin spice ice cream for a delightful contrast in flavors.
- Halloween Cookies: Serve with themed sugar cookies to create a festive dessert spread.
- Hot Chocolate: A warm cup of hot chocolate complements the cake perfectly, especially on a chilly Halloween night.
- Fruit Salad: A fresh fruit salad can provide a light counterbalance to the rich cake.
Storage and Reheating
- Refrigerator Storage: Store any leftover cake in an airtight container in the refrigerator for up to 5 days.
- Freezer Storage: You can freeze slices of the cake by wrapping them tightly in plastic wrap and then placing them in a freezer-safe container to preserve quality for up to 2 months.
- Reheating: If serving chilled, allow the cake to sit at room temperature for 30 minutes before serving. For a warm slice, gently microwave it for 10-15 seconds.
Common Mistakes to Avoid
- Not Prepping the Pans: Skipping the greasing or lining of your cake pans can lead to sticking. Always prepare your pans beforehand.
- Skipping the Cooling Stage: Frosting a warm cake can melt the frosting and lead to a messy presentation.
- Overbaking: Keep an eye on the baking time; an overbaked cake will be dry instead of moist.
- Not Mixing Ingredients Properly: Ensure not to skip the creaming of butter and sugar, as it creates air, giving better cake rise.
Halloween Spooky Birthday Cake: Background & Cultural Inspiration
Halloween has roots in ancient Celtic customs, celebrated as Samhain, marking the end of the harvest season and beginning of winter. Over time, it evolved into a holiday known for costumes, haunted houses, and themed treats. The tradition of enjoying flavorful, spooky-themed foods, like the Halloween Spooky Birthday Cake, brings a festive spirit to gatherings while celebrating community and family. This cake reflects both a seasonal celebration and a joyful birthday, combining elements of festivity and tradition into one delicious dessert.
Frequently Asked Questions
Can I use a different type of flour?
Yes, you can substitute with cake flour for a lighter texture, but adjust the liquid accordingly.
How can I make the cake ahead of time?
You can bake the cakes a day in advance. Just wrap them tightly after cooling and store them in the refrigerator.
How do I make it less sweet?
Reduce the amount of powdered sugar in the frosting for a less sweet option, or consider using a cream cheese frosting for a tangy contrast.
Can I use food coloring gels instead of liquid?
Yes, gel food coloring is a great option because it provides vibrant color without altering the frosting’s consistency.
How should I store leftover cake?
Store leftover cake in an airtight container at room temperature for up to 3 days, or refrigerate for longer freshness.
Final Thoughts
The Halloween Spooky Birthday Cake is not just a dessert; it’s an experience that brings joy and festivity to any celebration. Its delightful flavors and spook-tacular appearance make it a worthy addition to your holiday traditions. Whether you’re hosting a birthday party or simply enjoying the fall season, this cake is sure to bring smiles and create lasting memories in your kitchen. Give it a try, and watch as it becomes a favorite in your household!












