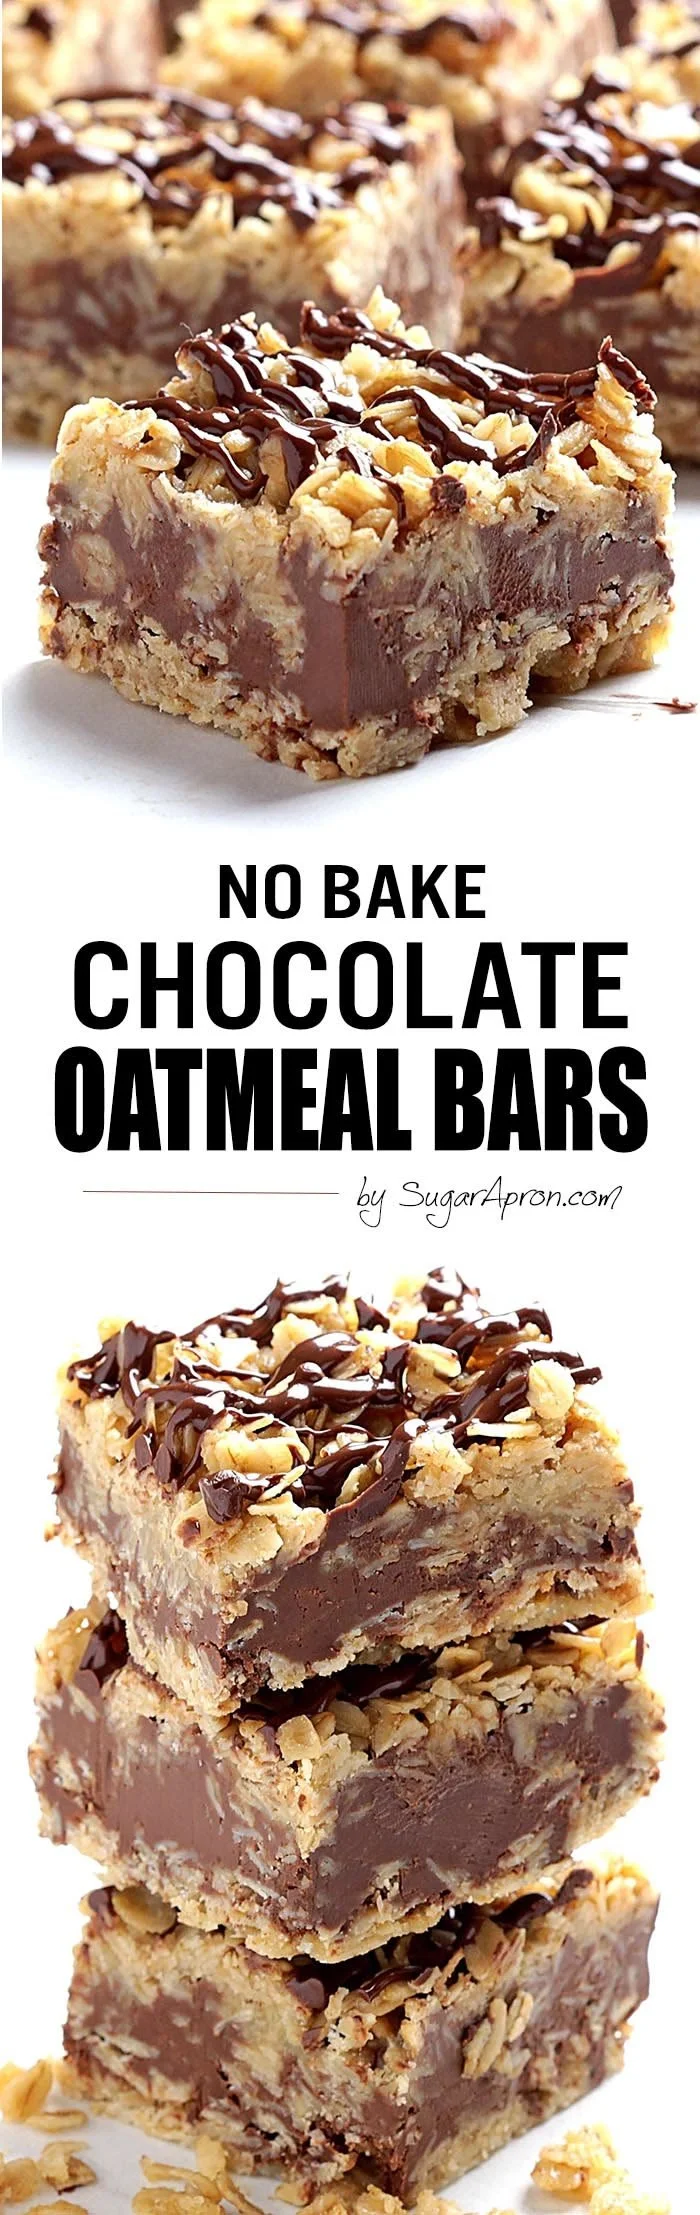
No Bake Chocolate Oatmeal Bars are a delightful treat that combines the rich flavors of chocolate with the wholesome goodness of oats. This recipe is perfect for busy days when you crave something sweet yet nutritious, and it comes together quickly with minimal effort. Plus, these bars are a fantastic option for meal prep and snacks on the go.
Why You’ll Love No Bake Chocolate Oatmeal Bars
- Quick and Easy: These bars require no baking, making them a simple solution for satisfying your sweet tooth. Just a bit of mixing and chilling is all it takes!
- Nutritious Ingredients: Packed with oats and peanut butter, these bars offer a combination of fiber and protein, making them a more wholesome snack option.
- Customizable: You can easily swap out ingredients or add your favorites, allowing for endless variations to cater to your taste or dietary preferences.
- Perfect for Meal Prep: Make a batch ahead of time and store them in the fridge for easy access to a quick snack or dessert throughout the week.
- Family-Friendly: Kids love the sweet, chocolatey taste, and they can help with the easy preparation, making it a fun family activity.
- Portable Snack: These bars are easy to transport, making them a great choice for lunch boxes, picnics, or on-the-go snacks.
Recipe Overview
- Prep Time: 15 minutes
- Cook Time: 0 minutes (no baking needed)
- Total Time: 2 to 3 hours (including chilling)
- Servings: 12 bars
- Difficulty Level: Easy
Ingredients You’ll Need for No Bake Chocolate Oatmeal Bars
-
For the Base:
- 1 cup butter
- 1/2 cup brown sugar (packed)
- 1 teaspoon vanilla extract
- 3 cups rolled oats
-
For the Filling:
- 1 cup semisweet or dark chocolate chips
- 1/2 cup peanut butter
These ingredients work together to create a chewy, satisfying texture. You can substitute almond butter for a nut-free option or use maple syrup for a vegan-friendly sweetener.

How to Make No Bake Chocolate Oatmeal Bars
1. Prepare the Dish
Line an 8-inch or 9-inch square baking dish with parchment paper, letting it hang over the edges. This makes it easier to lift the bars out later. If you prefer thinner bars, you can use a 9×13-inch dish.
2. Melt Butter and Sugar
In a large saucepan over medium heat, combine the butter and brown sugar. Stirring frequently, melt until the butter is fully dissolved and the sugar is incorporated. Add the vanilla extract and mix well.
3. Mix in Oats
Reduce the heat to low and add the rolled oats to the saucepan. Stir continuously for 3 to 4 minutes until everything is evenly blended and the mixtures become sticky.
4. Create the Base Layer
Pour half of the oat mixture into the prepared baking dish. Press it down evenly with a spatula or your hands to form a solid base. Set the remaining mixture aside for the top layer.
5. Make the Filling
In a small microwave-safe bowl, combine the peanut butter and chocolate chips. Microwave in 30-second intervals, stirring in between, until smooth and fully melted.
6. Assemble the Bars
Pour the melted chocolate mixture over the base layer in the baking dish, reserving about 1/4 cup for drizzling. Spread the chocolate evenly over the base.
7. Add the Top Layer
Spoon the remaining oat mixture over the chocolate layer, pressing down gently. Drizzle the reserved chocolate mixture over the top for added flair.
8. Chill to Set
Refrigerate the bars for 2 to 3 hours or overnight to set completely. Once firm, remove from the baking dish by lifting the edges of the parchment paper, and cut into bars.
9. Serve
Let the bars come to room temperature before serving for the best texture.
Tips for Success
- Mind the Boil Time: The texture of the oat mixture depends on how long you cook the butter and sugar mixture. If it doesn’t boil long enough, the bars may turn out too soft; if boiled too long, they could be dry.
- Use High-Quality Chocolate: The richness of dark or semisweet chocolate elevates the flavor, so choose good-quality chocolate chips.
- Press Firmly: Ensure the oat mixtures are well-packed in both layers for better structure.
- Chill Long Enough: For the best results, allow the bars to chill thoroughly before cutting; this helps them hold their shape.
Easy Variations
- Nut-Free: Replace peanut butter with sunflower seed butter for a nut-free version suitable for school lunches.
- Add-ins: Incorporate dried fruits like cranberries or raisins for added texture and sweetness.
- Flavor Infusion: Throw in a pinch of cinnamon or a splash of almond extract for a flavor twist.
- Coconut Variation: Add shredded coconut to the oat mixture for a tropical touch.
- Protein Boost: Mix in protein powder or chopped nuts to enhance the nutritional profile.
What to Serve with No Bake Chocolate Oatmeal Bars
- Fresh Fruit: Serve with sliced bananas, strawberries, or apples for a refreshing contrast.
- Yogurt: Pair these bars with a dollop of Greek yogurt for a creamy complement to the chewy texture.
- Milk or Plant-Based Milk: A cold glass of milk is a classic and satisfying pairing for these chocolatey bars.
- Ice Cream: For an indulgent treat, consider serving these bars a la mode with your favorite ice cream.
Storage and Reheating
- Refrigerator Storage: Store the bars in an airtight container in the refrigerator for up to one week.
- Freezer Storage: For longer storage, freeze the bars wrapped in parchment paper and then in plastic wrap for up to 3 months. Thaw in the fridge before enjoying.
- Best Reheating Method: If desired, you can warm them slightly in the microwave for about 10-15 seconds, but be careful not to overheat and lose their texture.
- Meal Prep Note: These bars make an excellent meal prep item, as they can be made ahead of time and consumed throughout the week.
Common Mistakes to Avoid
- Not Packing the Layers Firmly: Failing to press down the oat mixture can result in crumbly bars that don’t hold together.
- Overcooking the Butter Mixture: Cooking the sugar mixture too long can dry out the bars, so keep an eye on it.
- Inadequate Chilling Time: Cutting the bars too early can result in messy pieces, so allow sufficient time for chilling.
- Using Low-Quality Ingredients: Opting for inexpensive or subpar ingredients can compromise flavor; quality makes a difference.
No Bake Chocolate Oatmeal Bars: Background & Cultural Inspiration
No-bake desserts have gained popularity for their convenience, especially in warmer months when baking can heat up the kitchen. Oat-based desserts are a staple in many cultures, offering wholesome benefits combined with delightful flavor. The use of oats in snacks goes back generations, providing a source of energy and comfort. Chocolate, on the other hand, is a universal favorite that transcends boundaries, making these bars a global indulgence.
Frequently Asked Questions
What can I substitute for peanut butter?
You can use almond butter, sunflower seed butter, or any nut butter according to your preference or dietary needs.
Can I make these bars vegan?
Yes, you can easily make them vegan by using dairy-free butter and dairy-free chocolate chips.
How long do these bars last in the fridge?
When stored properly in an airtight container, these bars will last up to one week in the refrigerator.
Can I freeze No Bake Chocolate Oatmeal Bars?
Absolutely! They freeze well and can be stored in the freezer for up to three months.
How do I know when the bars are set?
The bars should be firm to the touch after chilling. If they feel sticky, they likely need more time in the fridge.
Final Thoughts
No Bake Chocolate Oatmeal Bars are a delicious and easy treat that anyone can whip up, making them an ideal addition to your snack repertoire. With minimal effort, you can create a sweet snack that’s perfect for busy days or satisfying cravings. Give this recipe a try — it’s a culinary win-win that you’ll reach for time and again!